Urban and Outdoor Preparation, Product Reviews and General Discussions about Living near and Enjoying the Blue Ridge Mountains of Virginia.

Saturday, February 8, 2014

The Jeff White and R.Jones Bushcraft Knife

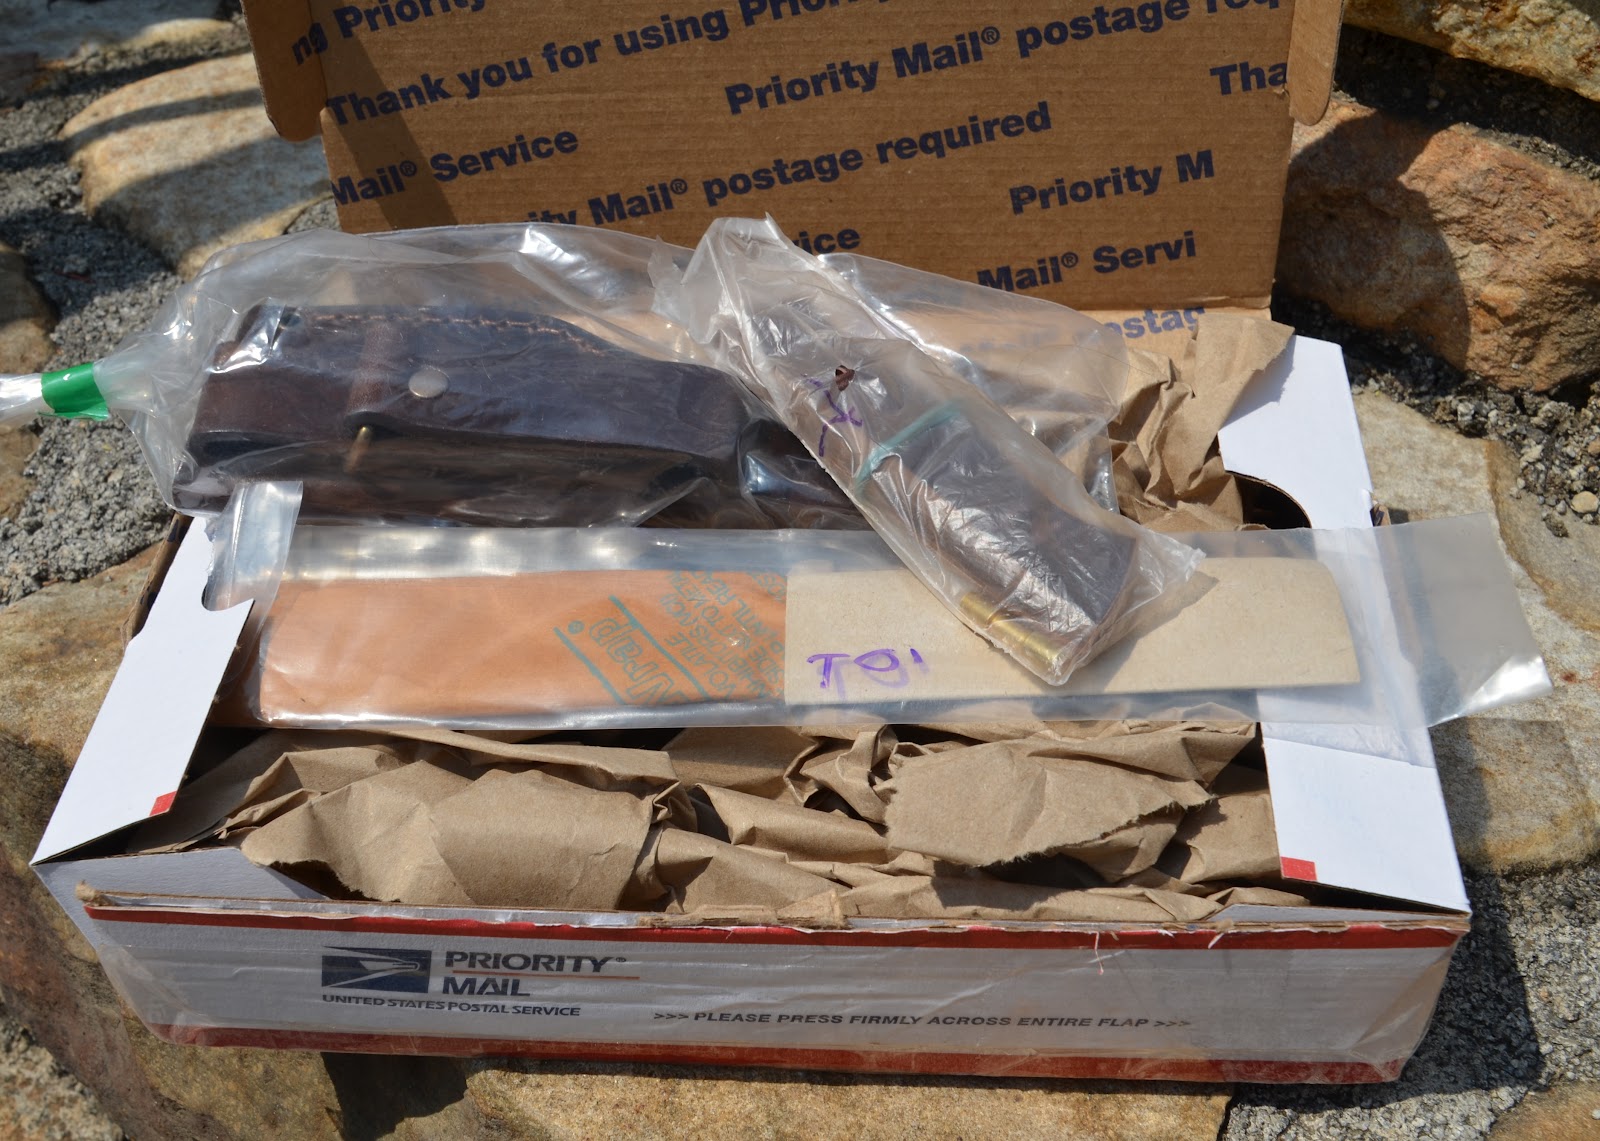
Discovering hidden treasures and then sharing them with others is always exciting to me. That's what I've attempted to do through this blog.  Now, discovering hidden treasures in the custom knife world where function, quality and aesthetics come together well in a single knife is rare.  It is even more rare when those elements in a custom knife are available at a very reasonable cost.  From time to time, I find myself visiting the BushcraftUSA forum.  Back in November, I ran across several posts that caught my attention referring to a custom knife that was designed through the collaboration of  Robert Jones (aka Beo-wulf) and Jeff White a custom knife maker. Robert makes custom, hand-sewn leather knife sheaths; however, the design of this particular knife -- The Jeff White and R.Jones Bushcraft Knife -- was conceptualized by Robert.  The knife can be purchased from Robert either on Ebay or through the BushcraftUSA Vendor forum here.  If you visit Robert's vendor page you will see the excellent reviews and the high praises that this knife deserves.  I must admit, after reading through the forum, I was captivated and convinced that this was a knife worth getting. Receiving and opening the package and inspecting the knife up close and personal confirmed that I had made the right choice. The blade out of the package was sharp, the knife felt good in my hands, and I was immediately drawn to its simplicity and beauty. I was able to hone the knife to a very scary sharp edge in no time. Also, I removed the original finish on the curly maple handles, and finished it with boiled linseed oil. The curly maple really popped by doing this. Here are the specifications:
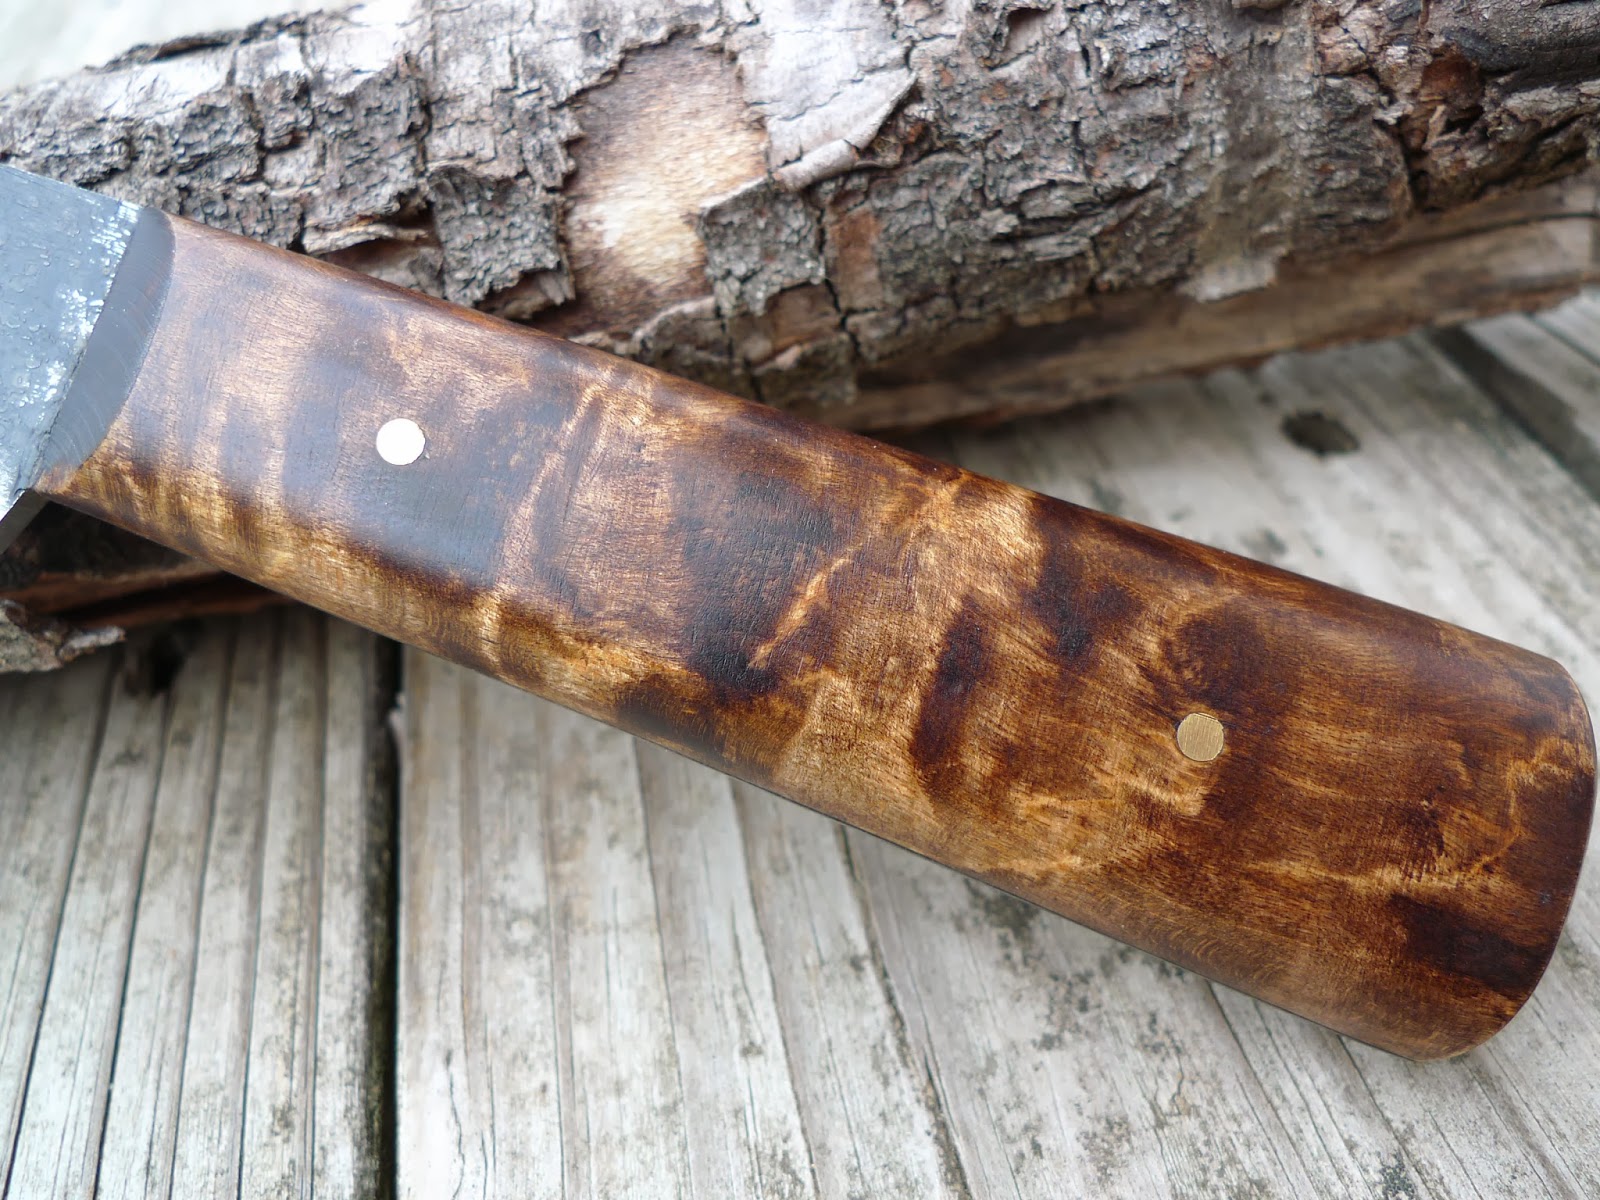
Jeff White and Jones Bushcraft Knife:

Made from 1095 High Carbon Steel
Full Tang construction - 1/8" Thickness
4.75" Blade Length
4.5" Handle Length
Beautiful Curly Maple Scales
Secured with 2 Brass Pins
Robert Jones Hand-sewn Leather Sheath
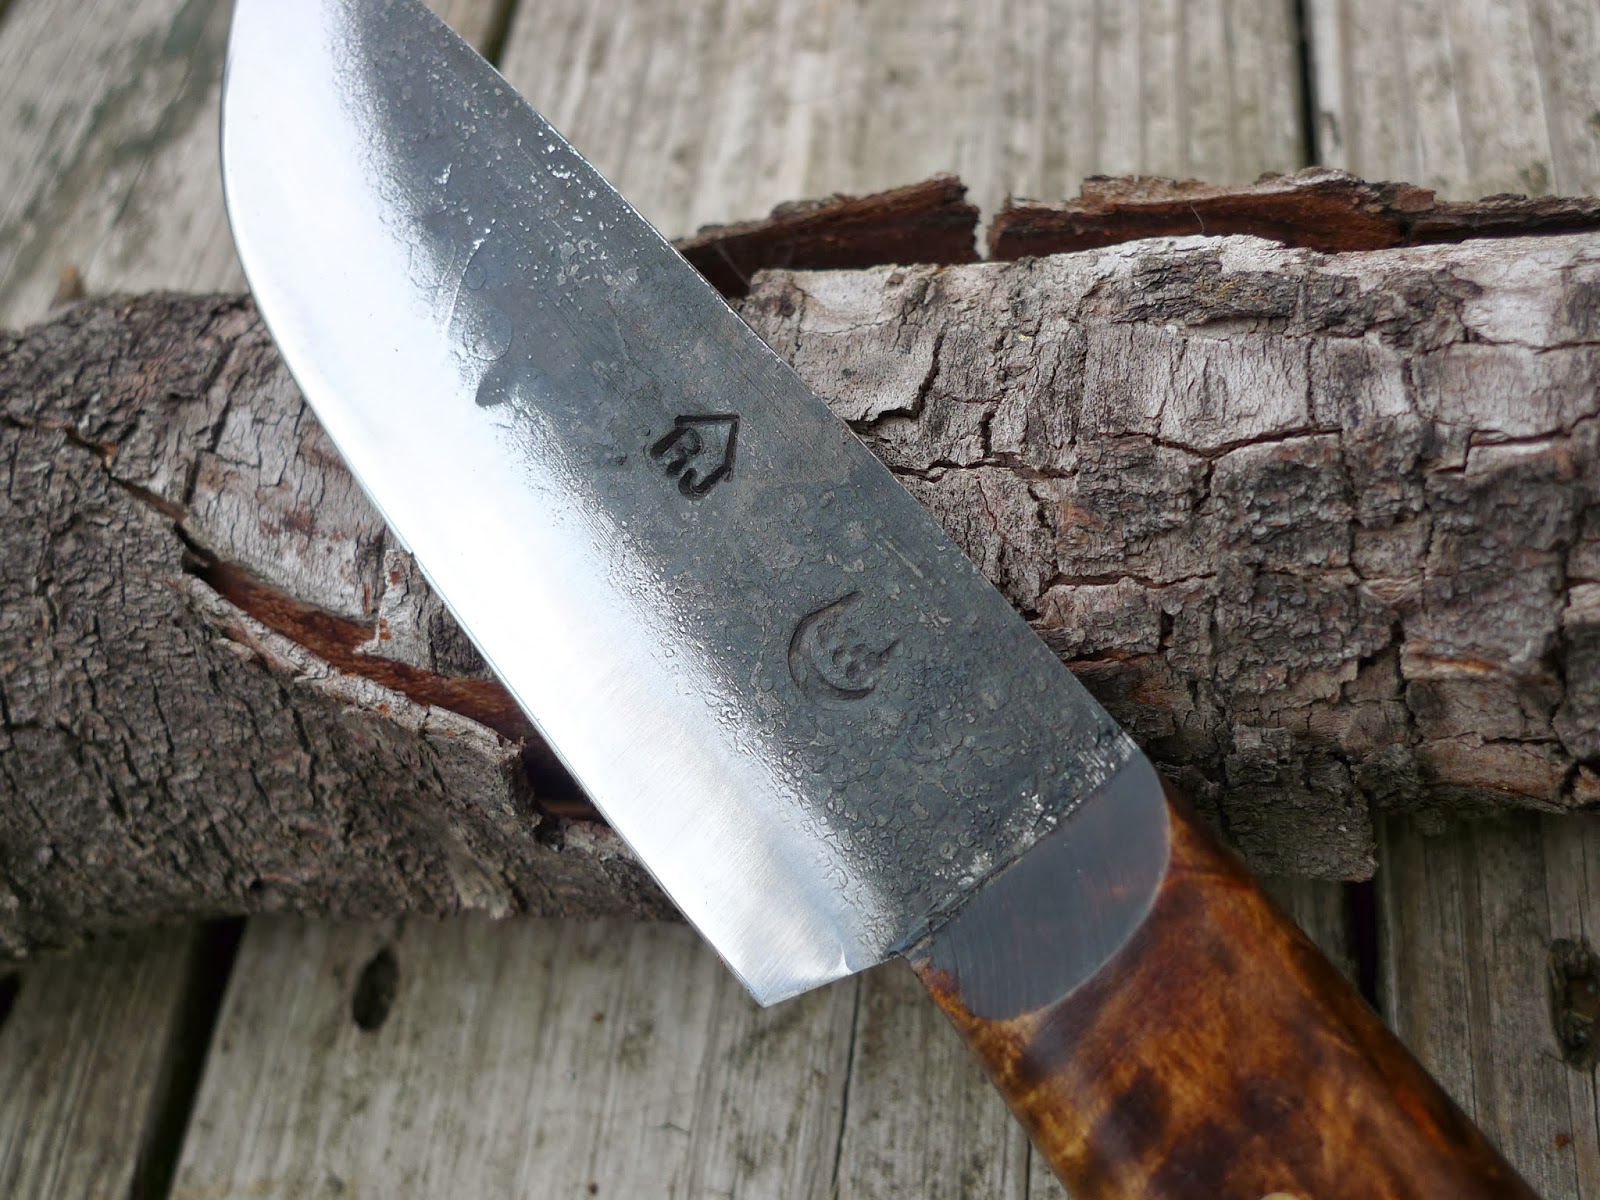
The knife blade is stamped with the Maker's marks of both Robert Jones and Jeff White.  What makes this knife aesthetically pleasing is the way 2/3rds of the blade has been left unfinished from the heat treatment and about 1/3rd of the blade is polished and sharpened.  By adding the curly maple scales, the knife has a very rugged, noble and classic look.  The styling and design is quite simple, beautiful, yet effective.  I've used this knife off and on for a variety of tasks in the kitchen for food prep; outdoors prepping wood for a fire; notching; carving, slicing, feathering, etc.  The knife just works well and holds an edge well. I have been very pleased and impressed.  The leather sheath is also of a simple design; made of thick leather and hand-sewn. My impression is that this sheath will last forever.  The sheath complements the knife very well; no doubt, Robert, when he designed the knife, had in his mind the very sheath design that would be a perfect mate for the knife. This a true custom knife, so keep in mind, should you order this knife, your knife will only be similar to what I received.  The finish left from the heat treatment and the polished portion will certainly be different than what I have pictured.  As well, the curly maple handles will, very likely, be different, depending upon the stock used by Jeff White.  Nevertheless, I'm confident that you will be satisfied.  There are certainly no shortages of excellent custom knife makers to choose from; however, the Jeff White and R.Jones Bushcraft knife reminds you of bygone days with its simple and rugged design.  More importantly, it is beautiful, functional and priced right!  ~Keep it Sharp.

Friday, February 7, 2014

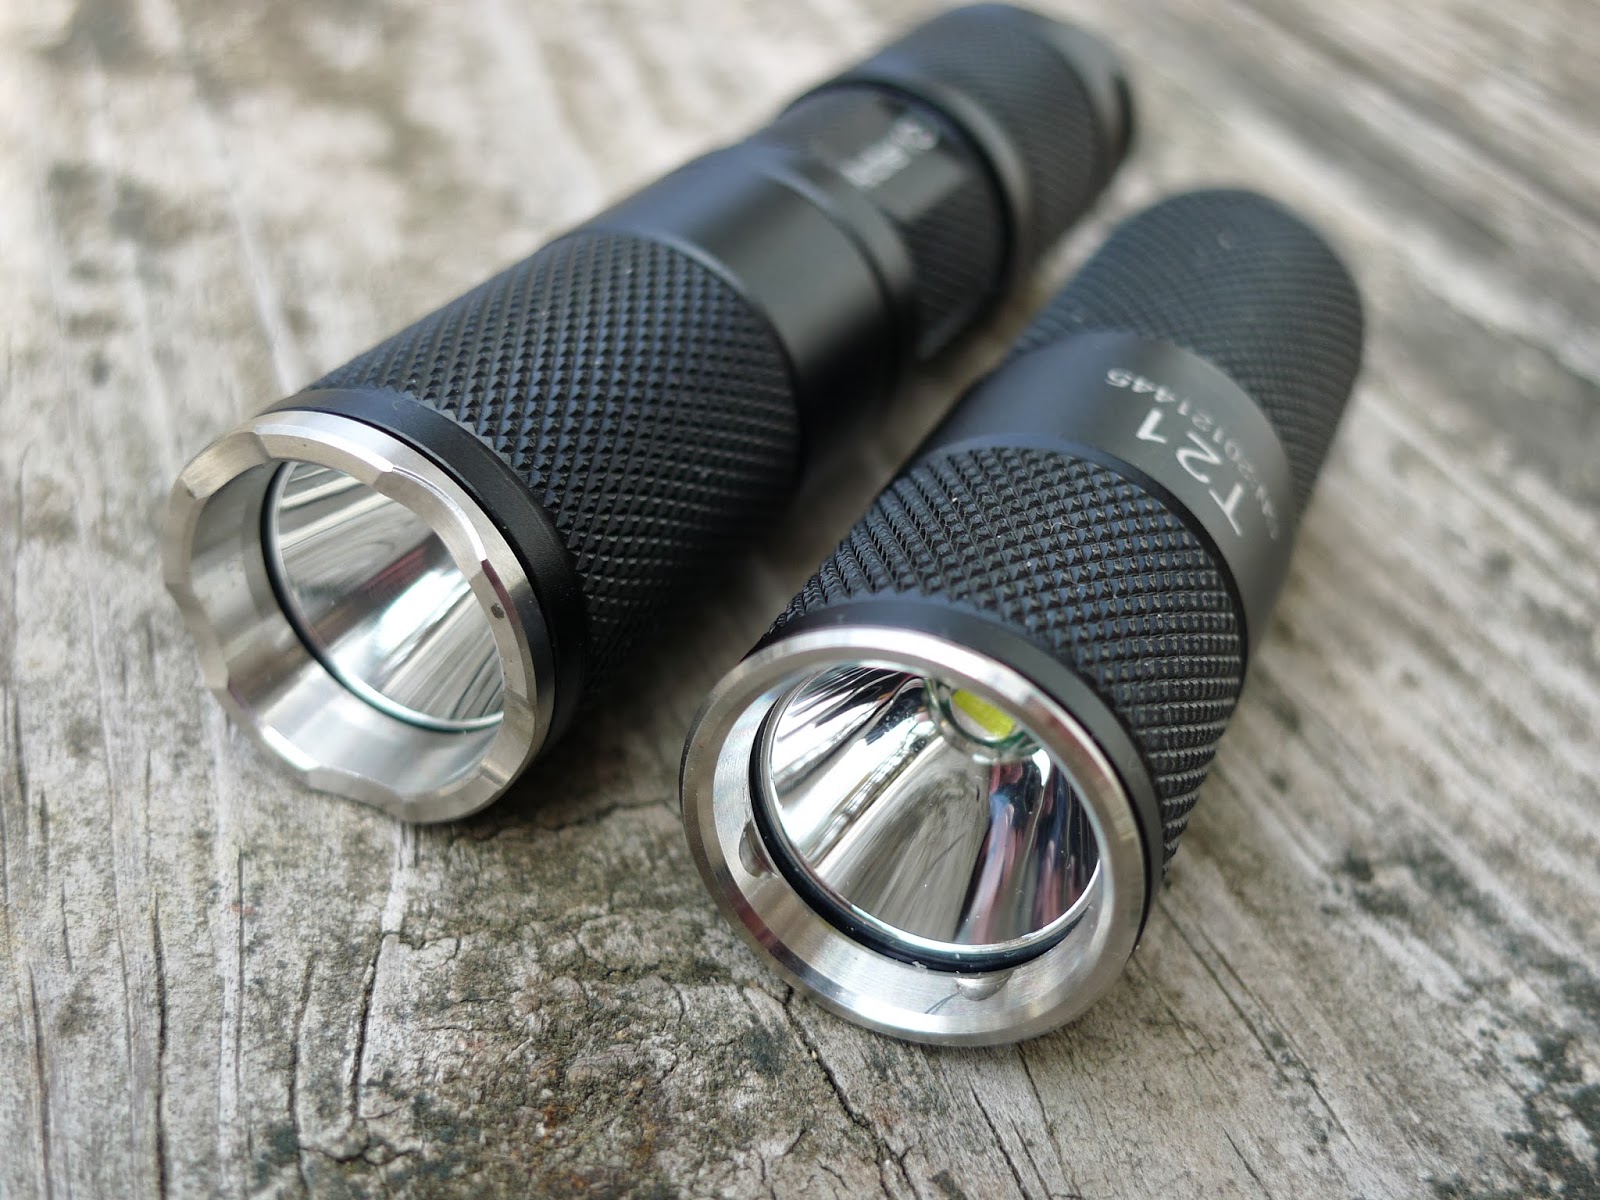
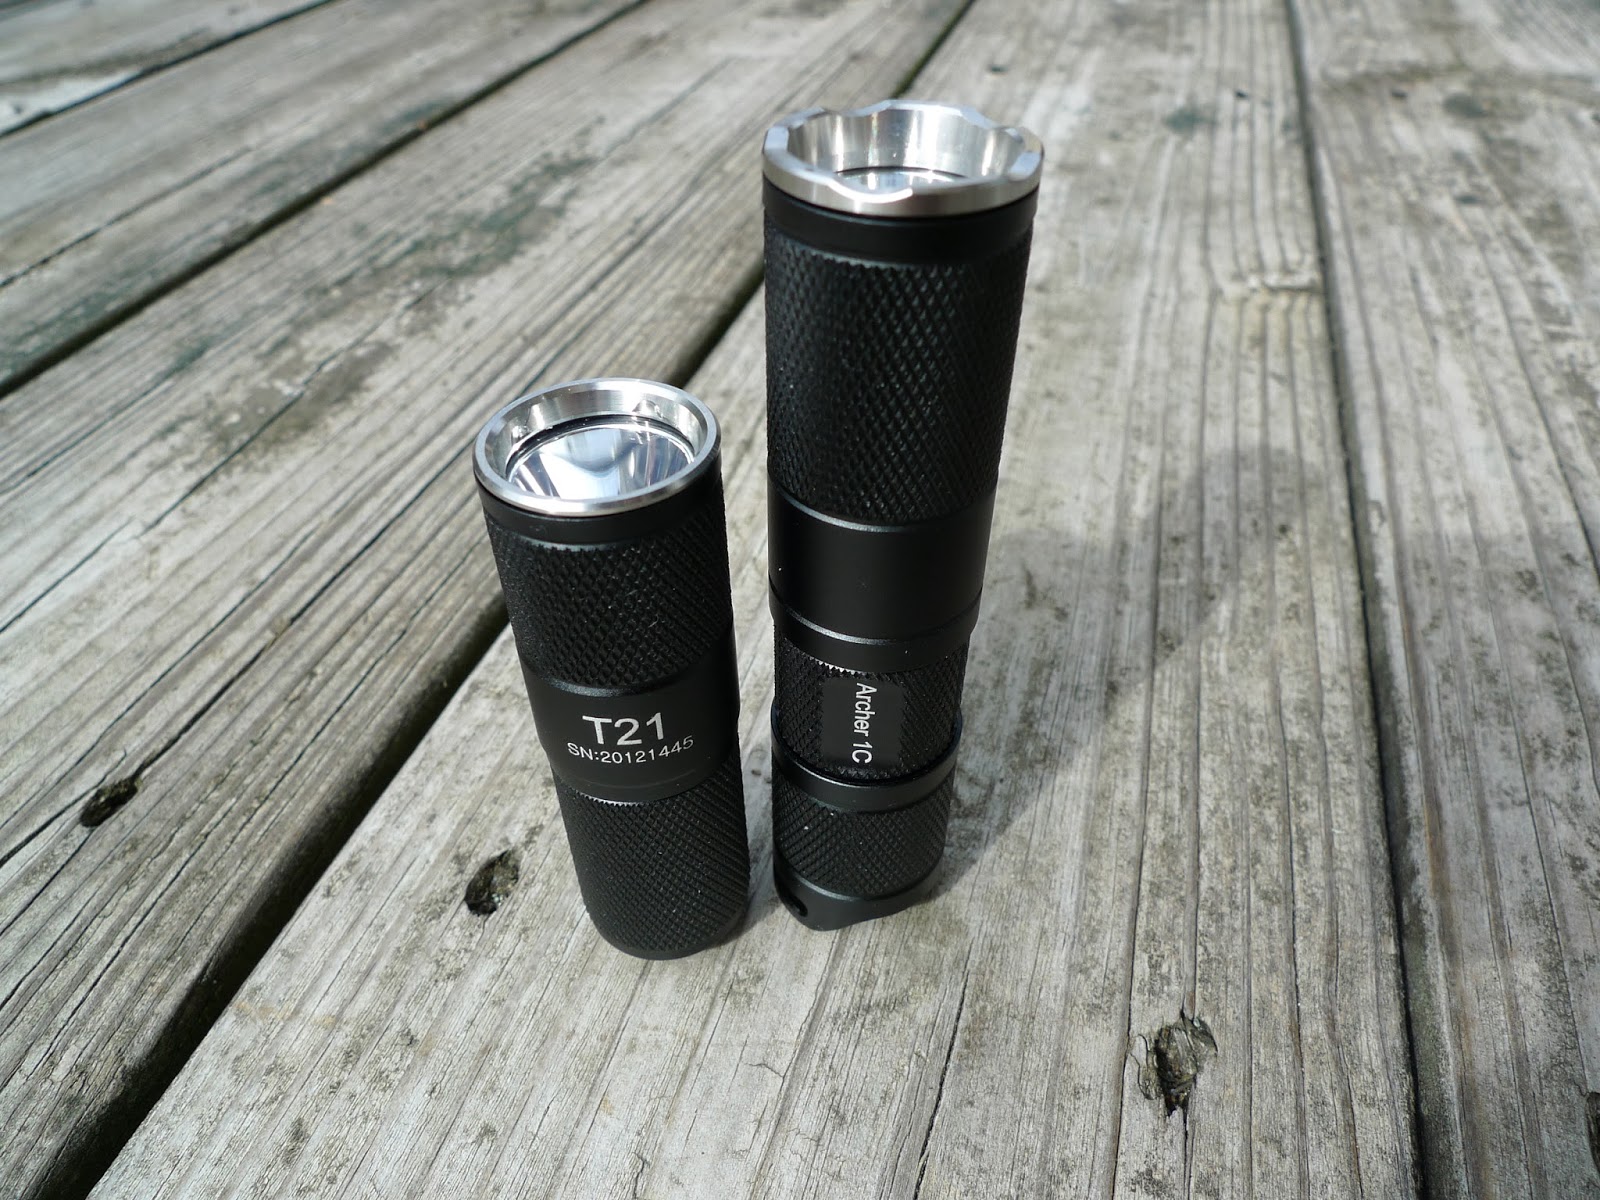
ThruNite T21 and ThruNite Archer 1C Flashlight

Over the past few years, I've acquired several LED flashlights.  The very first LED flashlight that I purchased was the Energizer Brand at Target. It's marketed as a tactical flashlight; spec'd with 37 Lumens using AA Batteries and has a simple click on, click off rear switch.  For the price, this has been an amazing light; so much so, I bought several lights for my laptop case, briefcase, cars and day pack. Last year, I became acquainted with the Fenix Brand of lights. I've been very impressed with the overall quality, build and usefulness of these lights, as well. Granted, the Fenix lights tend to be quite a bit more expensive than the Energizer; however, there are additional features that come with the added expense. I've been carrying the inexpensive Fenix E01 on my key chain for about two years now. It's been an extremely useful light, albeit, with only 13 lumens (from a single AAA Battery) but has been very handy and economical. I'm very sure that the battery has been changed out only twice in two years.

This week I received two new flashlights from ThruNite. Both of these lights are powered by a single CR123 Battery. Here are a few of the specifications on each:


ThruNite T21:

LED:  Cree XM-L
Battery: Uses Single CR123 or RCR123 Battery
Five Modes of Output:  .09 Lumens to 350 Lumens
Aircraft Quality Aluminum Body
Smooth Reflector
Waterproof
2.75" Long X .875" (Bezel)

ThruNite Archer 1C:

LED:  Cree XP-G2
Battery: Uses Single CR123
Five Modes of Output:  .2 Lumens to 281 Lumens
Aircraft Quality Aluminum Body
Smooth Reflector
Waterproof
3.75" Long X .875" (Bezel)

Simply put, both of these lights look good.  The stainless bezel contrasts beautifully with the black, hard anodized finish.  What I've come to appreciate with these two lights is the ease of operation and deployment. These lights don't come with a clip; however, either of these lights will EDC quite easily in a front pocket --- by the way, both of these lights have the ability to tail stand. The Fenix PD32 nor the Fenix LD12 are unable to tail stand. I especially like what ThruNite calls the Firefly mode which is less than 1 Lumen. This mode will be particularly practical for night adjusted eyes. In using these lights outdoors, on the brighter modes, I've noticed the beam on these two lights are different; no doubt since their LEDs are different. The T21 (XM-L) has a noticeably floodier beam compared to the Archer 1C (XP-G2) which is tighter.  So far, I have been pleased with the build quality, the available functions and most important the cost of these two lights. ~Keep it Sharp.

Update: Apparently, these two lights are no longer available from ThruNite. I've also noticed the prices on the ThruNite products have increased significantly.

Saturday, October 5, 2013

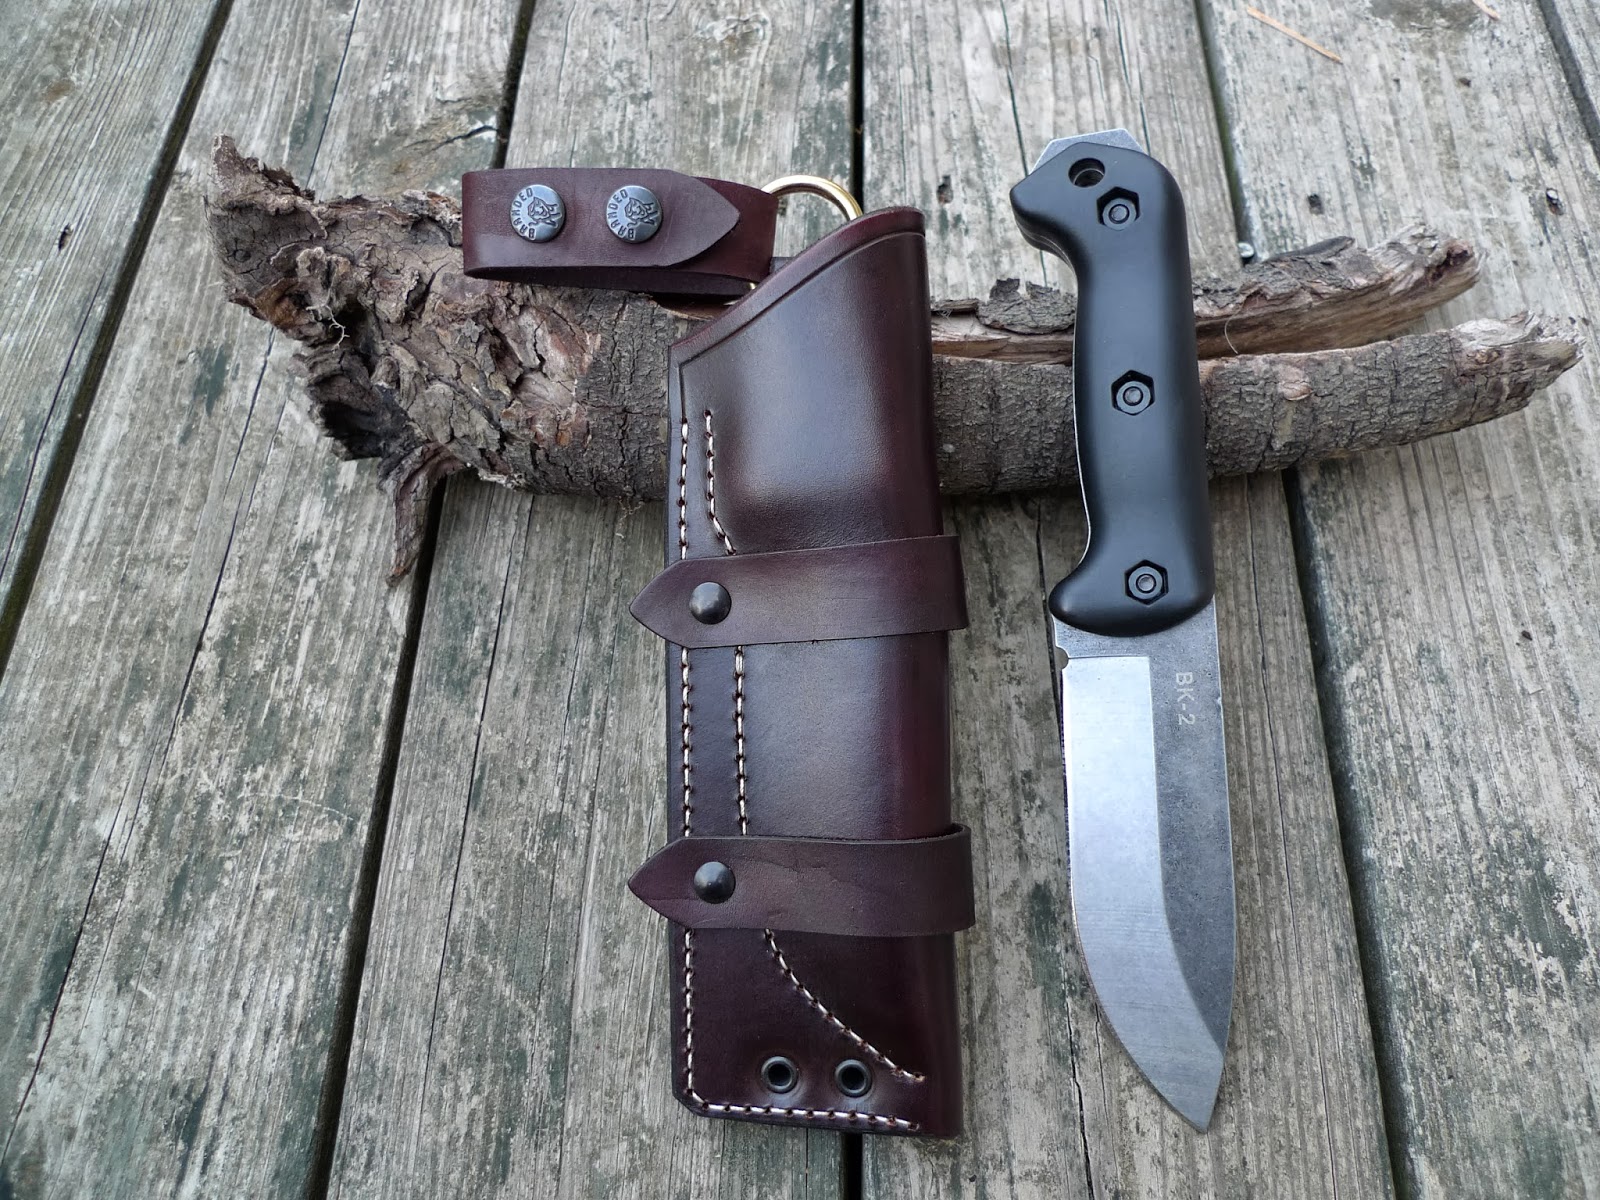
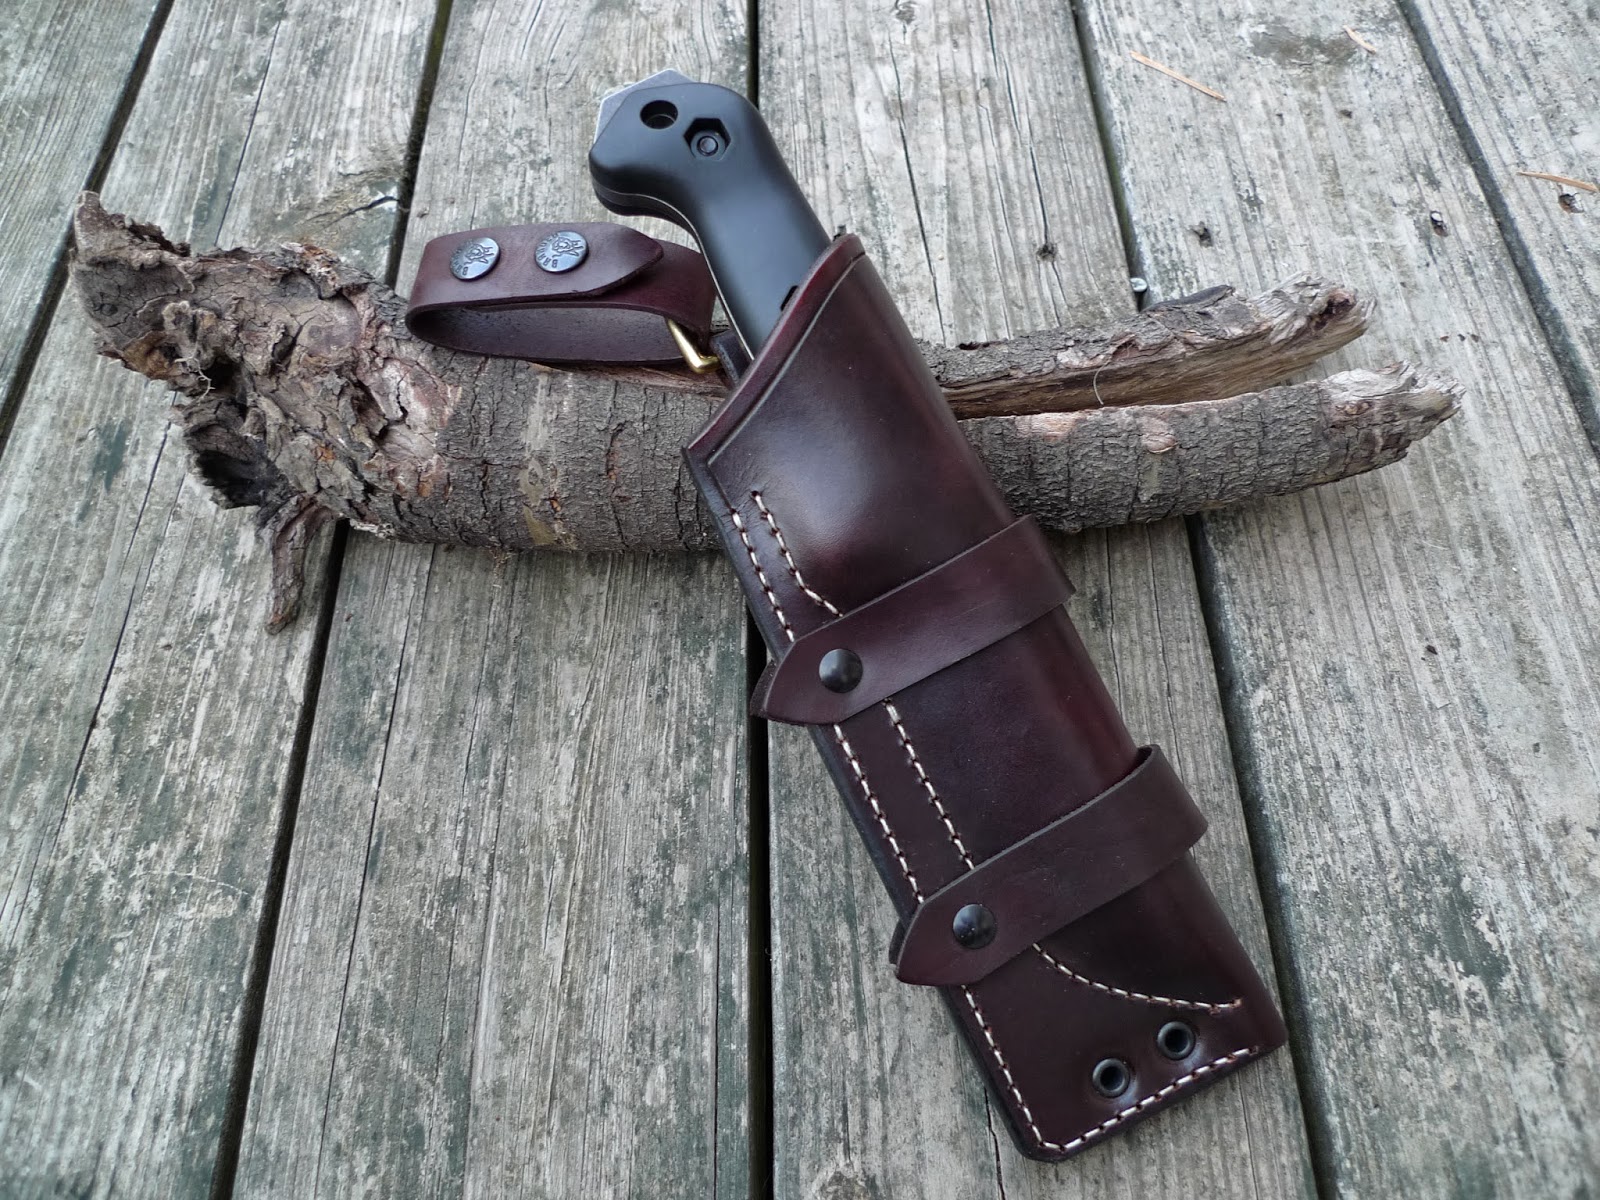
Becker BK2 and Ramos Custom Leather Sheath


What I have appreciated about the Becker line of BK knives is the opportunity to customize and modify the knife from the way they were received from the factory.  I own and regularly carry the Becker BK14 as a neck knife, and read some amazing testimonies on the durability and reliability of the Becker BK2.  So, I picked up a BK2 about 6 months ago; now, I‘ve not put this particular knife through any brutal torture tests, but, after handling the knife and performing your typical bushcraft/camping related tasks, I see why there is such high regard for the BK2.

For me, there is a real appeal for making a knife my very own, even if it’s just adding different scales or replacing the sheath.  Just like the Becker BK14, I completely stripped the factory coating off of my BK2.  I’ve contemplated adding custom Micarta or wood scales, but I’ve grown accustomed to the standard Grivory scales.  Perhaps someday I will change them out, but, for now, I find them to be plenty comfortable and I like the black color against the naked steel.  

The BK2 is an excellent knife; however, the stock sheath, for me, was a big disappointment.  I won’t go into a lot of details about my dislikes, but the overall serviceability of the stock sheath was definitely lacking.  So, what I really wanted to complement the knife was a quality leather sheath.  Fortunately, I recently came across Freddy Ramos of Ramos Custom Sheaths.  More information can be found here:  Ramos Custom Sheaths. While I have never met Freddy, his dedication to the art of leather sheath making is evident in the products he makes. All of the sheaths he makes are custom made; hand cut and hand sewn.  Freddy’s attention to detail and workmanship are first class; the quality of the leather he uses is exceptional, and I was very pleased with his customer service.  I had the opportunity to email Freddy a couple of times about my sheath order and he was always prompt and courteous in responding to my questions.  I tend to stress in my blogs that every product I purchase have a high cost to value ratio. I have found that this combination between the Becker BK2 and a custom leather sheath from Ramos Custom Sheaths meets the requirement.  ~Keep it Sharp. 

Saturday, September 7, 2013

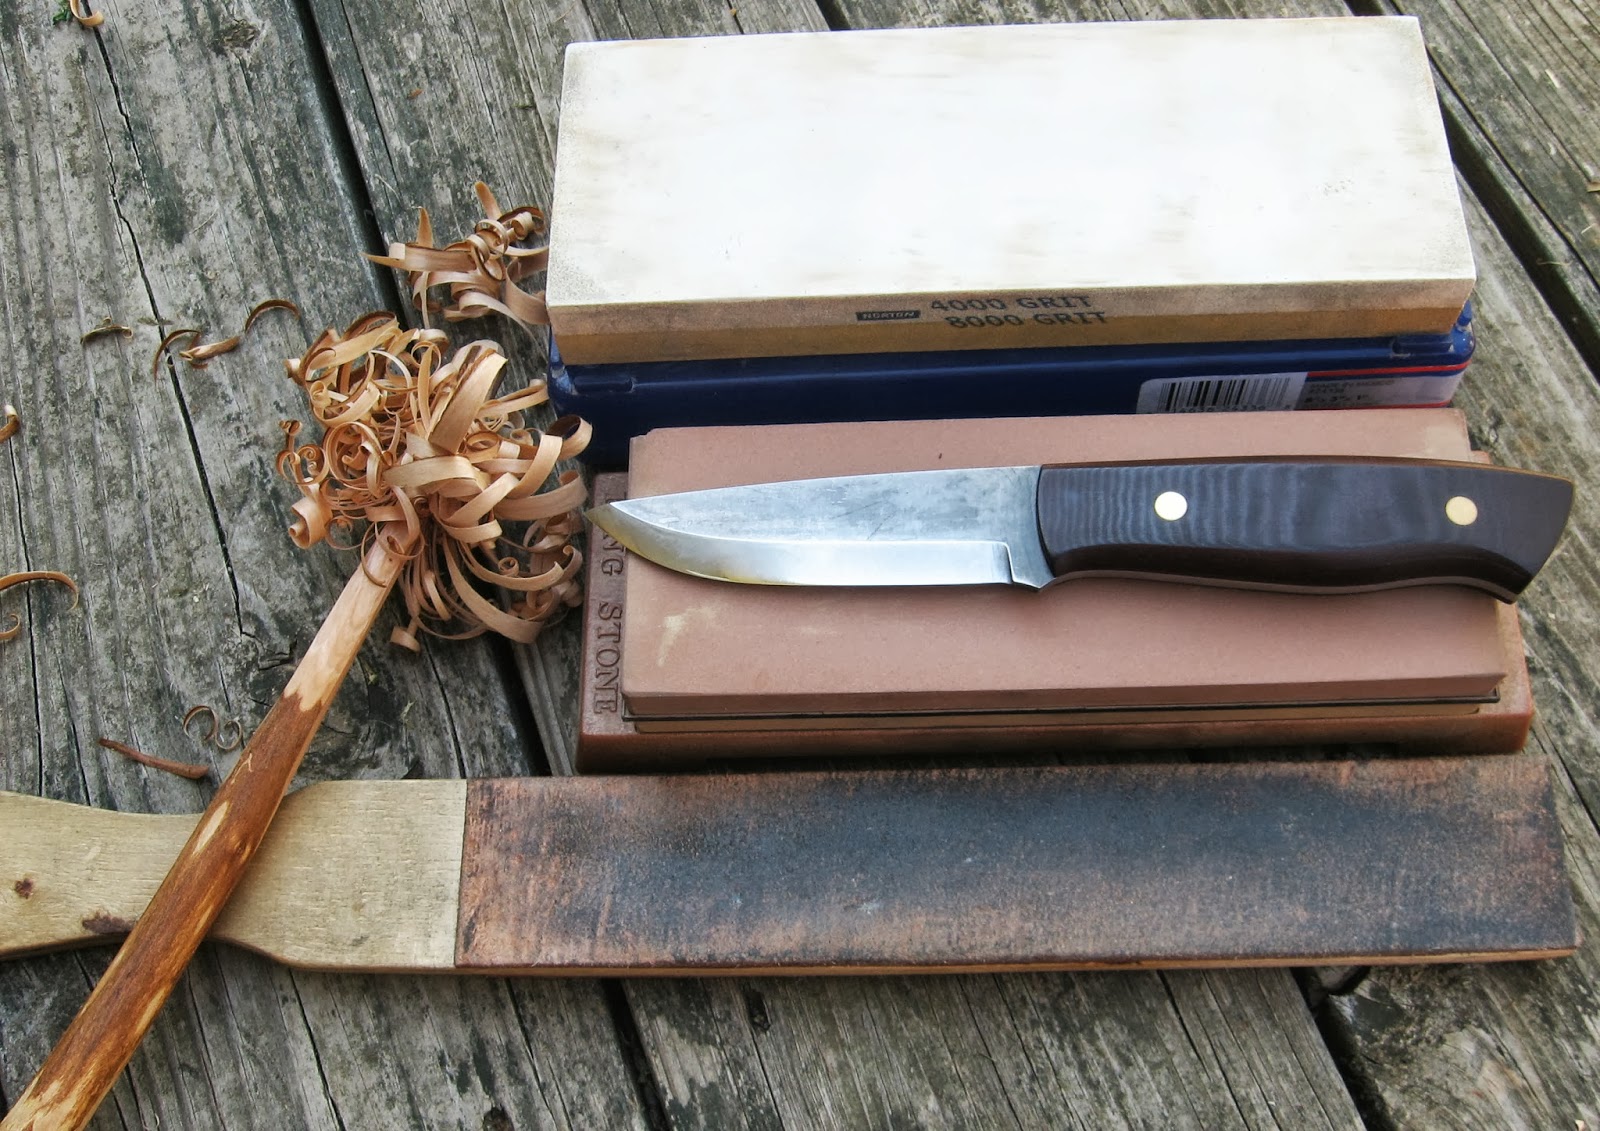
Bushcraft/Survival Knife Sharpening System

Norton 4000/8000 grit synthetic stone (Very Top)
King 1000/6000 grit natural waterstone (Middle)
Homemade Leather Strop (Bottom)
Recently, I've had several folks ask me about my knife sharpening system and how I get my knives so sharp. I have mentioned in some of my posts that I exclusively use waterstones to hone the edges of all of my knives and a leather strop to maintain a scary sharp edge. Now, I realize that there are several sharpening systems available to choose from like diamond sharpeners from DMT or the Lansky sharpening system. I have no doubt that these work great to hone an edge; however, I have found that the versatility and performance of waterstones and a leather strop work best for me.  I use this particular sharpening system on all of my knives; from pocket knives, bushcraft/survival knives to kitchen knives.  This system also is the best method to use on straight razors.  I have always been able to get a super sharp edge on a variety of edge types including scandi, flat and convex grinds.


As it is implied, the waterstones are designed to be used by soaking the stone in water and then keeping the stone wet throughout the sharpening process. The two brands of stones, I'm most familiar with are the Japanese Waterstones made by King which are natural stones; the other is the synthetic waterstones made by Norton.  The combination Japanese waterstone that I have is a 1000/6000 grit.    Because of the design of this stone and the slurry that it creates, this stone alone will handle almost all of your sharpening needs.  The 6000 grit is capable of putting a very decent final polish on the blade edge.  The Norton stone that I have is 4000/8000 grit which I used primarily as a finishing stone for my straight razors; however, I also use this stone for the final polish on my scandi grind knives.
This photo shows the mirrored finish on the Enzo Trapper
with a scandi-grind blade.

My final effort on sharpening any blade is to strop the blade on a leather paddle strop.  The strop that I use is "homemade" from a piece of 3/8" thick plywood, shaped to my liking with scrap leather glued to it. One side has a smooth finish and the other side is rough. This is a very economical way to maintain that hair popping edge on the knife.  I will often take the leather strop with me on camping trips just to keep a keen edge after working the knife in a variety of bushcrafting tasks. With just the leather strop, I have always been able to keep my knives sharp, even when being out on a multi-night trip.  It is incredible to me that a piece of leather on a paddle can be so effective in getting that hair popping edge.

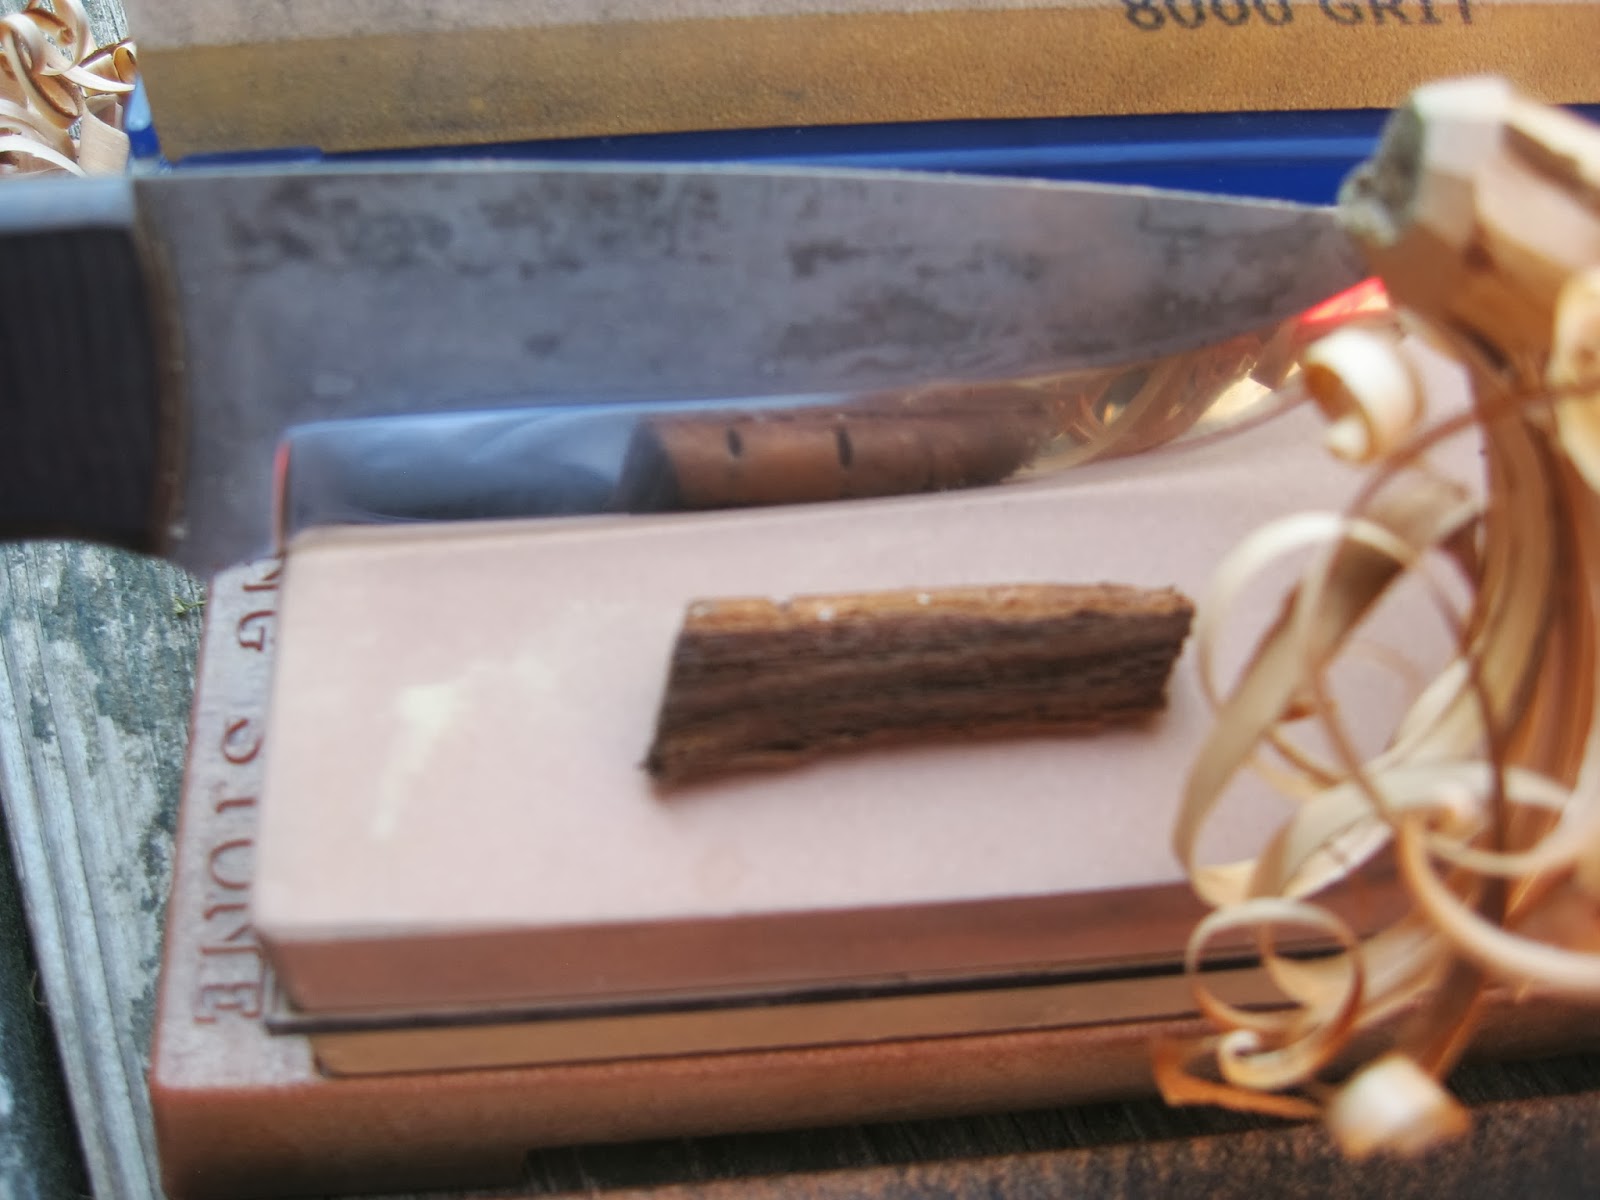
As I've said before, this is the system that works best for me.  While there may be other good sharpening systems; I've found that I can get a knife scary sharp more effectively and efficiently using the combination of waterstones and a homemade leather strop. Having confidence in a tried and true system that gets the job done is important to me...  I know when I've gotten my knife sharp enough when I get those fine curly shavings when making feather sticks.  ~Keep it Sharp.

Monday, August 19, 2013

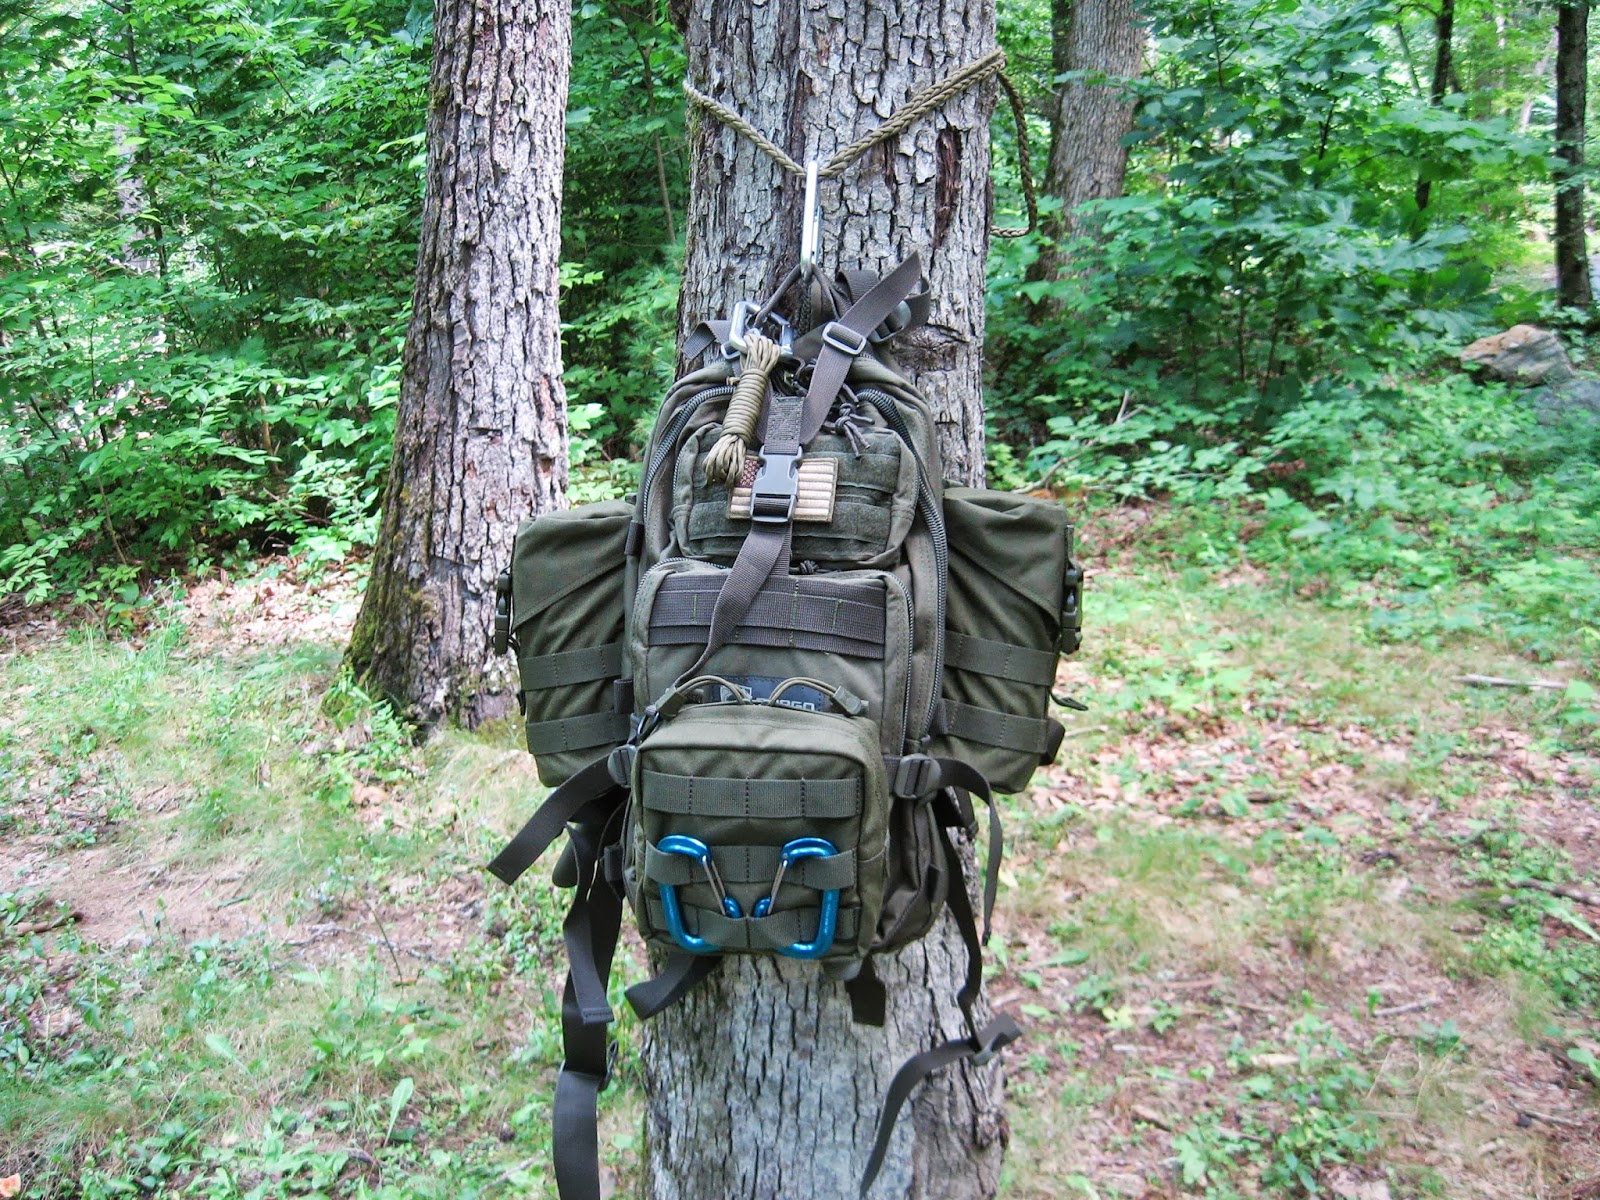
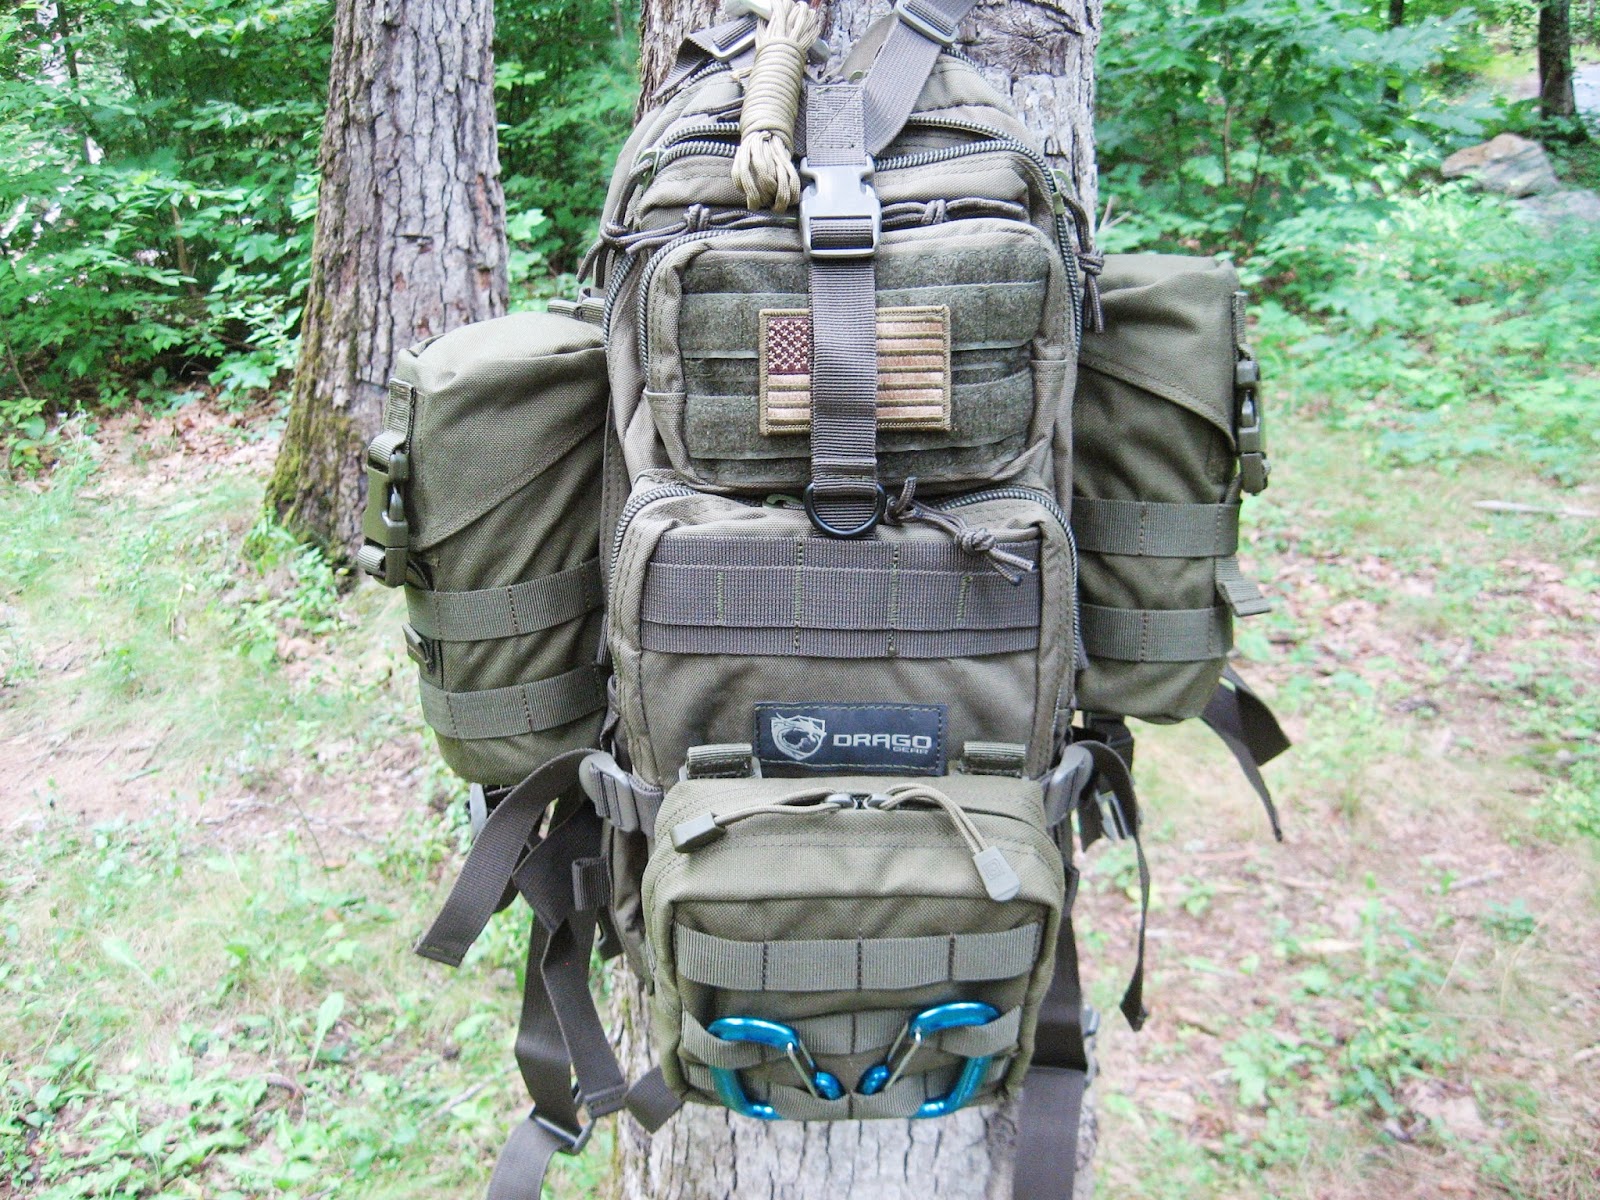
Drago Tracker Backpack Mini Review

I just purchased the Drago Tracker Backpack after retiring a North Face Yavapai that served me well for more than 12 years.  I was initially going to stick with the new version of the Yavapai, but the Drago Tracker seemed to be more versatile, especially as an extended Day Pack.  With the Molle webbing, I like having the ability to expand the pack beyond the 4 main compartments.  In the photo you can see that I have added two H2O pouches and a 6.6 pouch  (with blue carabiners) which I was able to get on sale from 5.11 Tactical.  This pack is hydration pack compatible, so is able to carry plenty of water now.  The OD Green Drago pack and the OD Green 5.11 pouches are a perfect match and the material are very similar.


The pack is made of 600 Denier polyester and appears to be well made.  I believe it will take a beating very well; and, that's important since I'd like this pack to last as long as the North Face.  On this particular outing, the pack was loaded with only 15lbs. of gear and was very comfortable to carry.  In fact, I was surprised how noticeably more comfortable it was compared to the North Face.  Due to the way this pack is made, there are ways to distribute the weight of gear and equipment evenly.  I believe that this bag has enough capacity with the way I have it currently configured, for it to easily be an overnight or 2 night pack.  Definitely with the number of attachment points, and even internal pouches, this is a versatile pack.  What I really like about the Drago Tracker Pack is that I can now stow all of my items systematically, so that each item can be stored in its own location.  I couldn't necessarily do that with the North Face.


Since it hasn't been thoroughly field tested at this point, I haven't decided for sure  if it's a favorite pack; but, it certainly has a lot of potential.  ~Keep it Sharp.

Saturday, June 8, 2013

Condor Bushlore Knife Review

The Condor Bushlore Knife is one that I have carried in my pack for about two years now.  In fact, I ended up buying a second Bushlore from Ben at Baryonyxknife.com a few days ago...  more on this a little later.  The Bushlore is a knife that has been reviewed countless number of times, so I don't expect to add much to what has already been written.  However, I write this review to not only express my satisfaction and why I recommend this knife, but to also to describe how to avoid some of the pitfalls that accompany this blade. Whenever, I go out into the woods (even on a short day hike) I always carry my Enzo Trapper with Micarta scales on my belt, but the Condor Bushlore always accompanies me inside my pack.  This knife has proven, for me, to be a very versatile blade capable of a variety of tasks from batoning wood, prepping firewood (ie. making feather sticks), and for preparing foods.  The blade has the ability to get a super sharp edge and I have found with proper care and utilization the edge retention on this knife is excellent.  The more I use this knife the more I like it.  Here are it's basic specifications having been made in El Salvador:

Full Tang Construction
1075 High Carbon Steel Blade
4 5/16" Blade Length
1/8" Blade Thickness
Hardwood Handle-Walnut
9 5/16" Overall Length
Quality Leather Sheath

The thing that has caused me to be impressed with this knife is the cost to value ratio.  I would rate this knife to be an excellent value for what you receive in the box.  If you've done any amount of research on this knife you will have read that most folks consider the sheath to be of such high quality that it alone is worth the purchase of the knife.  I wouldn't call the Bushlore a beater knife, yet it has been designed to be a workhorse and to accept abuse (within reason). It's a knife that you don't have to be concerned about when your out in the woods.  While I'm definitely one to keep track of my gear in the woods, if my Condor Bushlore was somehow lost, I wouldn't be as concerned compared to losing a more expensive knife. I've had my Bushlore out in a pouring rain with little opportunity to keep it dry to avoid potentially rusting the blade, yet, this wasn't a concern for me since I paid about $30 for it at the time.  Even so, I found that the blade withstood the moisture pretty well and it has always cleaned up nicely.  From the pictures above you can tell that that there doesn't appear to be consistency in the color of the handle material.  The more rosewood colored handle was the first knife that I acquired.  Both handles were stripped, sanded and re-finished with multiple light coats of boiled linseed oil.  I read somewhere that when boiled linseed oil was used to finish gun stocks, that light coats of oil was put on the wood in the following manner:  1 coat everyday for a week; 1 coat every week for a month; 1 coat every month for a year; and, 1 coat every year for life.  The key to putting on boiled linseed oil is super thin coats and letting it dry between applications so that the coatings don't become gummy.  I've used boiled linseed oil on all of my wood handles and the results turn out very nice.  This is a knife that looks good; I hate to say it, but all of my knives have to have a high aesthetic value; it must perform well and look good.  The Bushlore definitely falls into this category.
Now, some of the things to be aware of...  When I purchased the Bushlore back in June 2011, the folks at Condor had made a change to the Bushlore design.  The knife previous to the current design was much thicker and the useable edge on the knife was shorter.  It seemed that there may have been some quality issues with making the transition on the knife.  While the heat treatment on the blade was acceptable, the knife edge was not ground properly so that the blade was not sharp along the edge closer to the handle. I spent a lot of time and energy getting the full edge to be acceptable.  This knife is now super crazy sharp, is easy to maintain and a joy to use.  While we are on the subject of the edge, the Bushlore does not have a true Scandi grind; rather, it has a secondary micro-edge.  It's important to recognize this in order to get the edge to it's sharpest potential.  The handle also came very rough, but that was easily solved by stripping and sanding.  The other thing that I find on the first knife compared to my newest Bushlore is that the tang extends a wee bit past the handle material.  While this doesn't impact the comfort or practical use of the knife, some folks may find this unacceptable.  I suppose when I first purchased the knife I didn't have very high expectations of the quality. The good news is that on the second knife I purchased (dark brown handle) was from Ben at BaryonyxKnife.com.  The advantage of doing this is that Ben inspects every knife that he sells to insure that you are receiving a knife that meets his expectation ultimately for your satisfaction.  You can also request what he calls a "Special Grade" Bushlore where the blade has been thinned and the factory edge is refined.  When I received my Bushlore, I was very impressed with the quality; it simply looked better and came much sharper than my first purchase; and it was sharp along the entire edge. After a few strokes on a leather strop this knife was super crazy sharp.
Sharp enough to make paper curl.  These
 cuts were made against the grain using
the old Bushlore.

The overall fit and finish of this knife was superb compared to the first Bushlore.  So there is a real advantage to purchasing a knife from someone who provides this type of service.  For only a little more than what you would purchase the knife from Amazon or another dealer, you get the peace of mind knowing that you're going to get a knife that has been looked at and will be ready for service.  By the way, I have no financial interest in the Baryonyx Knife Co.; my only interest is getting quality gear at a reasonable price and knowing where they can be found. So my bottom line is that the Condor Bushlore may be considered a budget bushcraft knife and may only be a Woodlore clone, however, it is not a budget blade.  There is genuine value and performance in this piece of equipment that will not disappoint even the most hardcore bushcraft or knife enthusiast. ~Keep it Sharp.

Friday, June 7, 2013

Kelly Works Small Axe

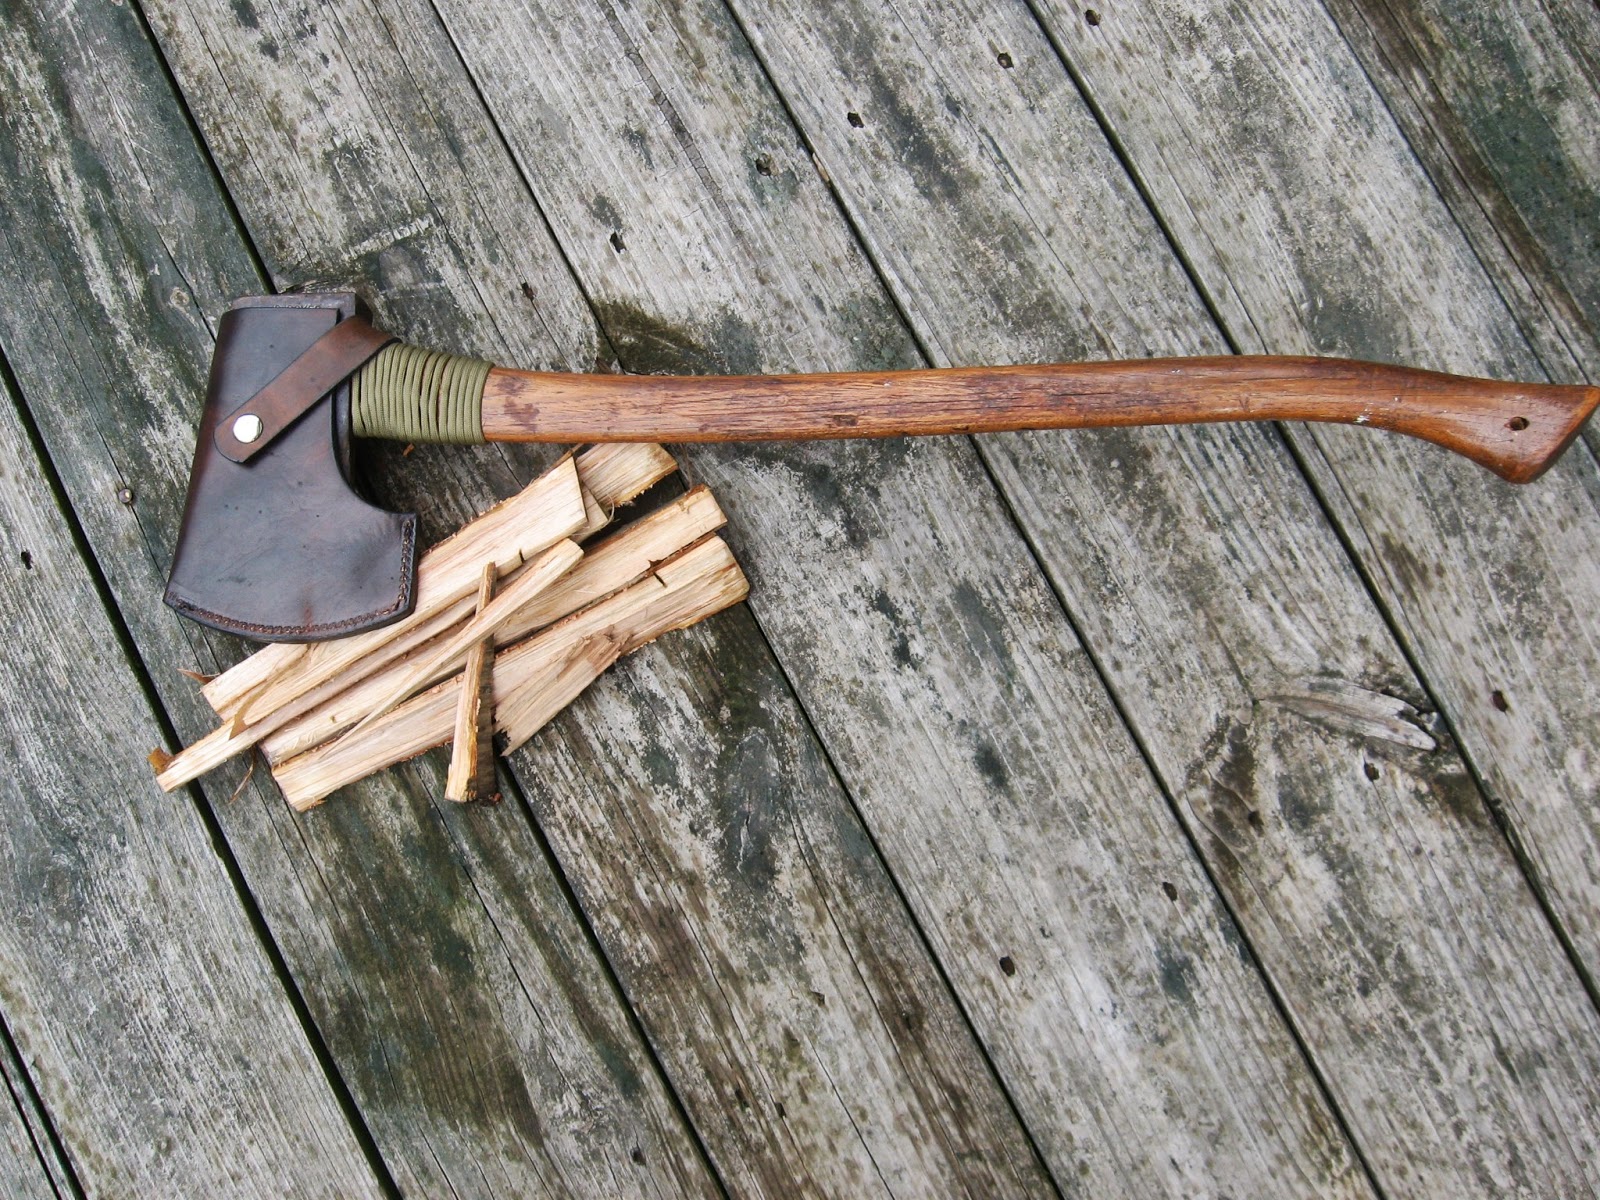
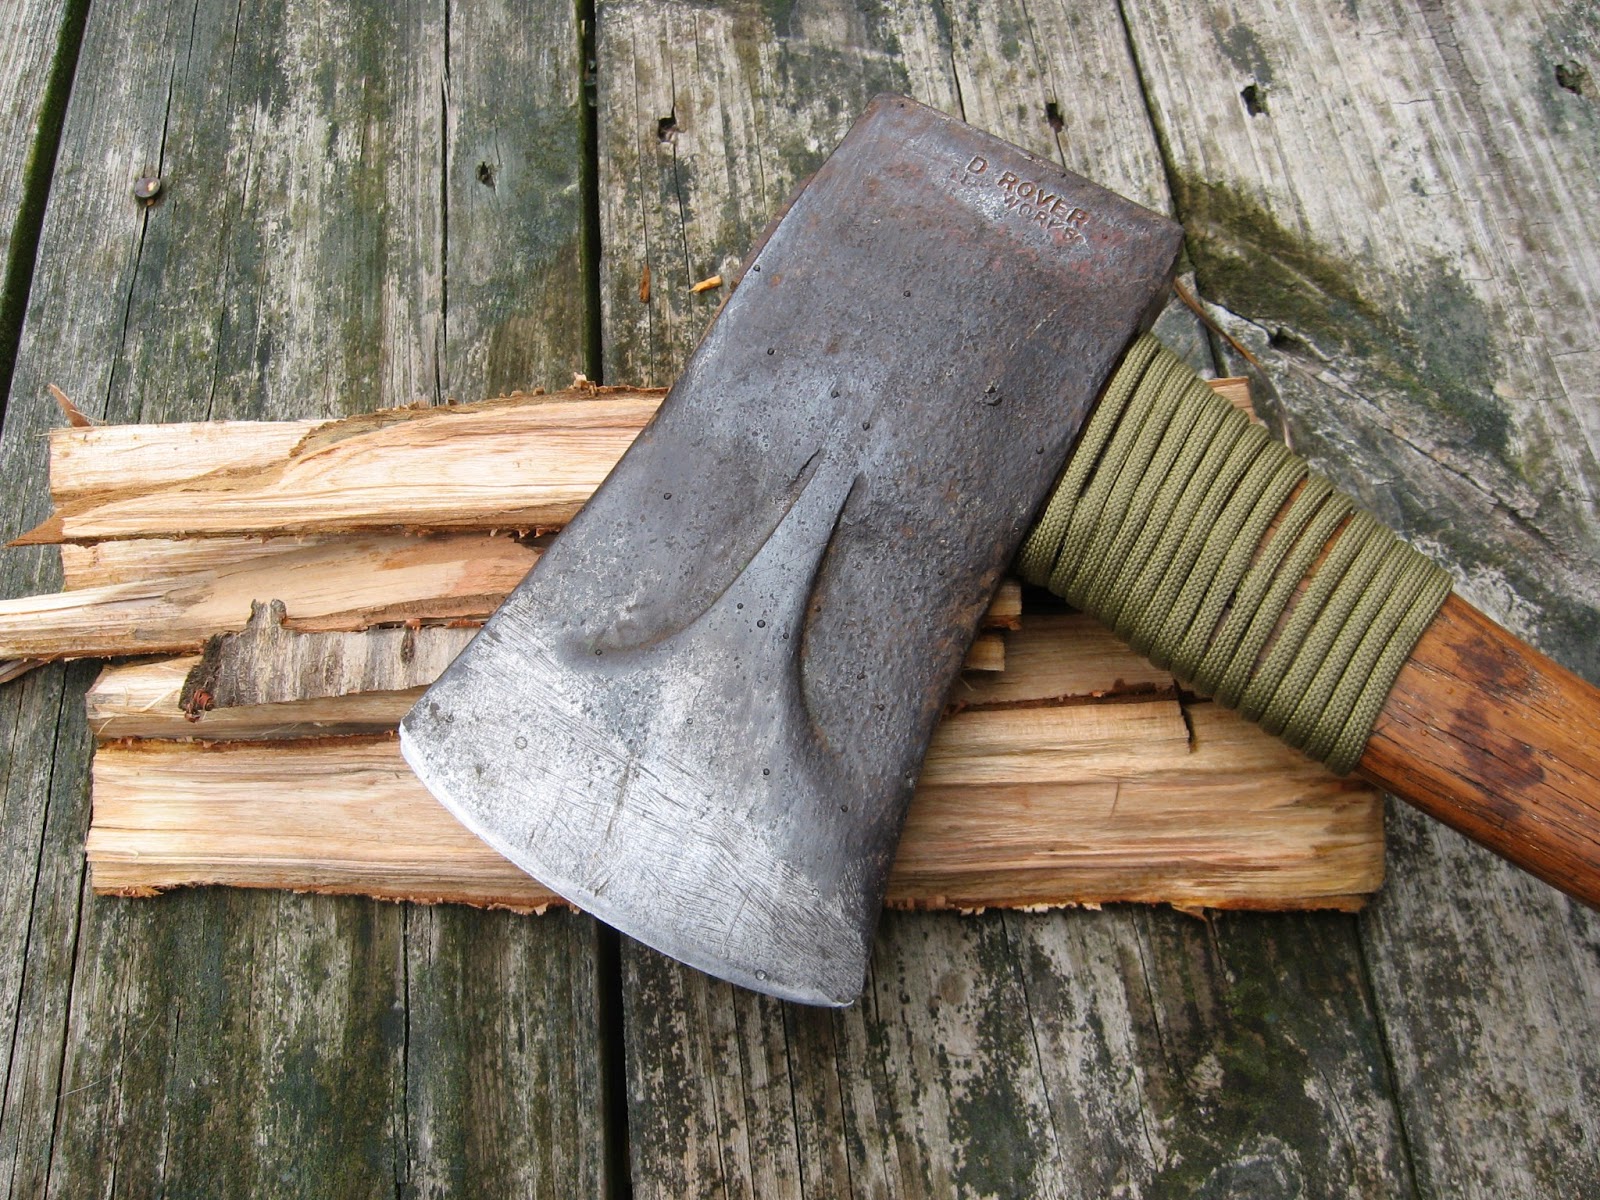
Every once in a while you run into a treasure that can't be passed up.  That was what happened to me today at a local antique store.  The hunt began after I had read on the Bushcraft USA forum of a guy who received an axe.  He basically entitled his post as a "Journey" in re-finishing an axe head.  Now, I already own a couple of axes, but there seemed to me some nostalgia in finding an old axe head or even and old axe that was not only serviceable, but, also had a story to tell.  So what I came across today was a small axe that had  "Red Rover" and "Kelly Works" stamped on the head.  The axe head also has a unique design called the Kelly Bevel on the head; and appears to be consistent with early model small axes.  I was able to find an old 1917 and 1925 hardware catalog on line; both displayed the Red Rover axe.  This axe was called a 'Boys" axe because of its more diminutive size.
My particular find measures out at 26" handle length and it would appear (based on the old catalogs) that the head weighs in at around 2.5 lbs.  This seems to make sense since the entire axe only weighs in at 3.5 lbs.  I was pleased to discover that the axe handle was still in serviceable condition.  There was just a bit of play in the head, but this was remedied in short order.  The axe head was in terrific condition and only required a slight bit of work on a course and fine stone to get the edge sharp.  So, while I had set out to find only an axe head with the intention of re-finishing the head and adding a new handle; instead, I found this little gem for a very reasonable price at $21.  Now imagine the possibilities of where and how this little axe has been swung if, indeed, it is more than 90 years old.  How many shelters did it build, how many trees felled and groves cleared.  Did it see military action overseas or did it stay home to help protect and serve?  I have no doubt it has a story to tell, and I hope more stories to come. Overall, I'm very happy with the new acquisition.  ~Keep it Sharp.

Saturday, May 25, 2013

Condor Nessmuk Knife Review and George Washington Sears


George Washington Sears who is also known by his pen name Nessmuk wrote a book in 1884, simply  titled Woodcraft.   This book is available for free in either .pdf or e-book format from a variety of sources including the Gutenberg Project.  The book itself is a short read which provides an interesting picture and perspective of this man’s view of life in the outdoors during the late 1800’s.  In many ways, the book reminds me of an 1884 version of YouTube in book form.  Nessmuk writes to chronicle some of his musings of wilderness outings and pokes fun of those who are less experienced than he.  At the same time, however, he provides information and reviews on important matters of woodcraft including details on the gear and equipment he carries, the appropriate types of shelter, how to build a campfire and how meals are to be prepared.  It appears that Nessmuk spent much of his adult life enjoying the outdoors, honing his craft and building upon his knowledge and experience.  Because of this, many consider Nessmuk the father of bushcrafting.  The book is an interesting read, and because it has some valuable information and is somewhat entertaining (and humorous), I would certainly recommend it. 

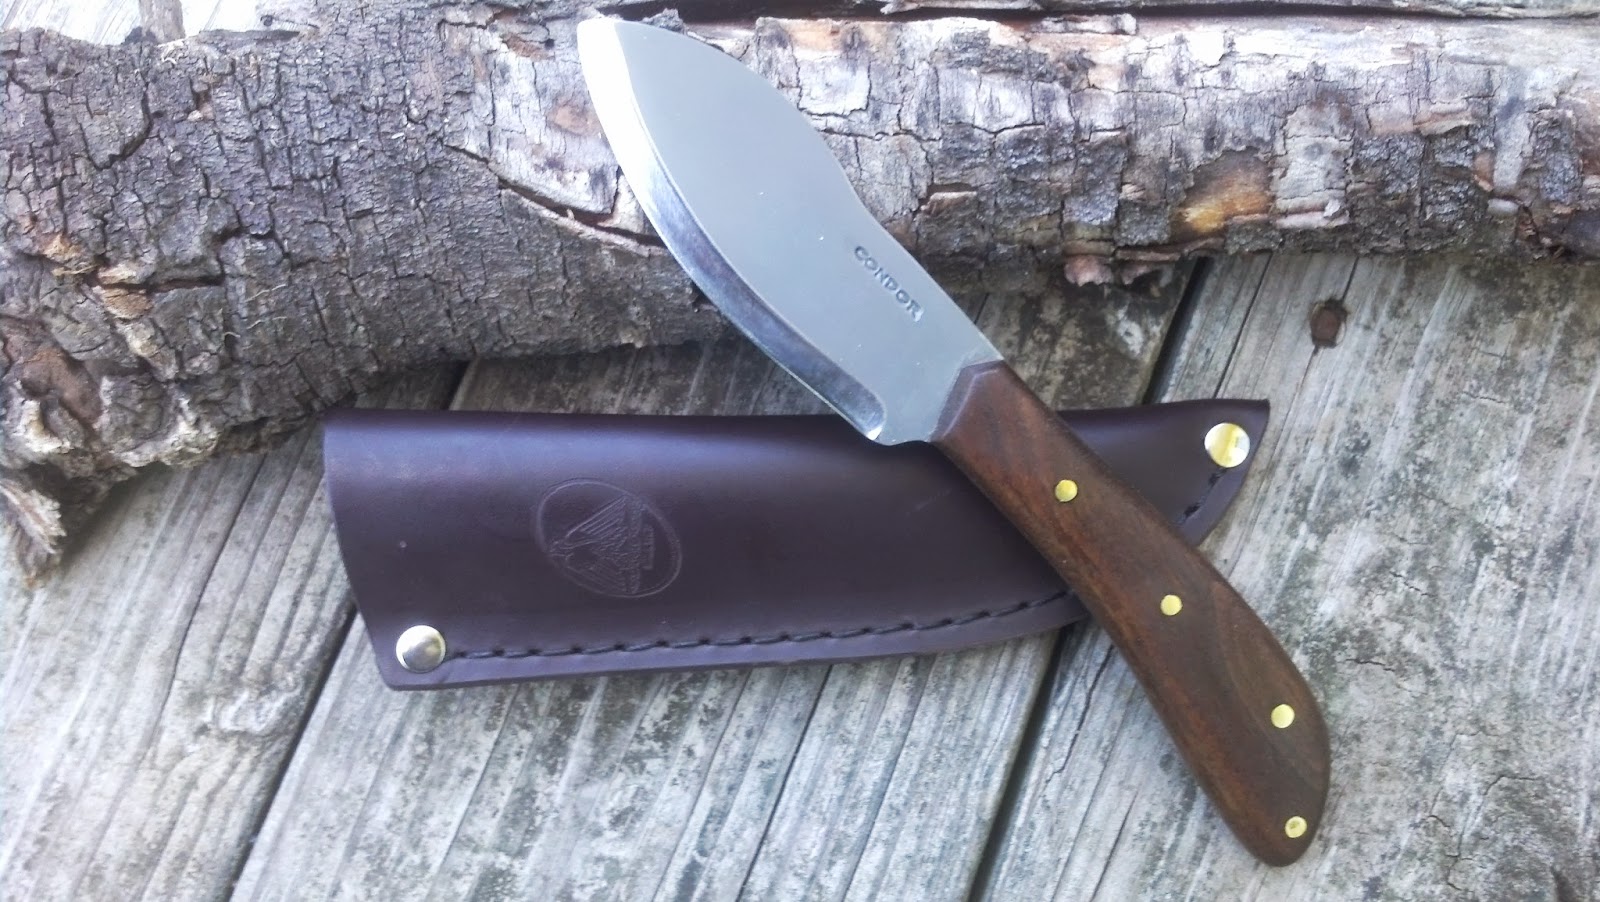
In tribute to the man Nessmuk and his book, I purchased the Condor Nessmuk.  The Nessmuk knife is a copy of the skinning knife which George W. Sears carried.  It has an odd shape that is specifically designed for skinning animals, however, I have found that the design is equally capable of being used for light bushcrafting and camping tasks.  I purchased this particular knife through Amazon for a very reasonable price.  The Condor brand of knives has a reasonably good reputation although I have read and experienced that their quality control is suspect, at times.  Initially, I was a bit disappointed with the quality of the knife as I received it.  The handle material which appears to be walnut was uneven and the finish was rough.  The blade was not very sharp, however, I was glad that the edge of the blade came close to the handle.  Despite
its initial shortcomings, this knife had tremendous potential.  After a couple hours of work to get the handle smooth and honing the blade razor sharp on my Japanese waterstones, my new Nessmuk knife has become a very serviceable tool.  The 1075 carbon steel blade is easy to sharpen and holds an edge reasonably well.  I also applied several coats of boiled linseed oil on the walnut handle.  Overall, I am very pleased with the results, and quite frankly enjoyed the time I spent getting the knife to its potential.  There is no doubt this knife makes a terrific skinner; but, it is also a great camp knife for food preparation and for light processing of wood for fires.  I have no hesitation in recommending this blade and I plan to carry this knife with me in my pack.  For those who may be interested in purchasing this knife, I would recommend you looking at BaryonyxKnife.com; for a little more than what I paid, you will receive a knife that has been inspected and have an opportunity to choose their special grade option.   By the way, the sheath that is supplied is excellent and compliments the knife very well.  The Condor Nessmuk, a very serviceable knife in tribute to a man and his words.  ~Keep it Sharp.
Saturday, December 1, 2012

Sanrenmu 710 - Limited Quantities For Sale

**Knives are No Longer Available for Sale**


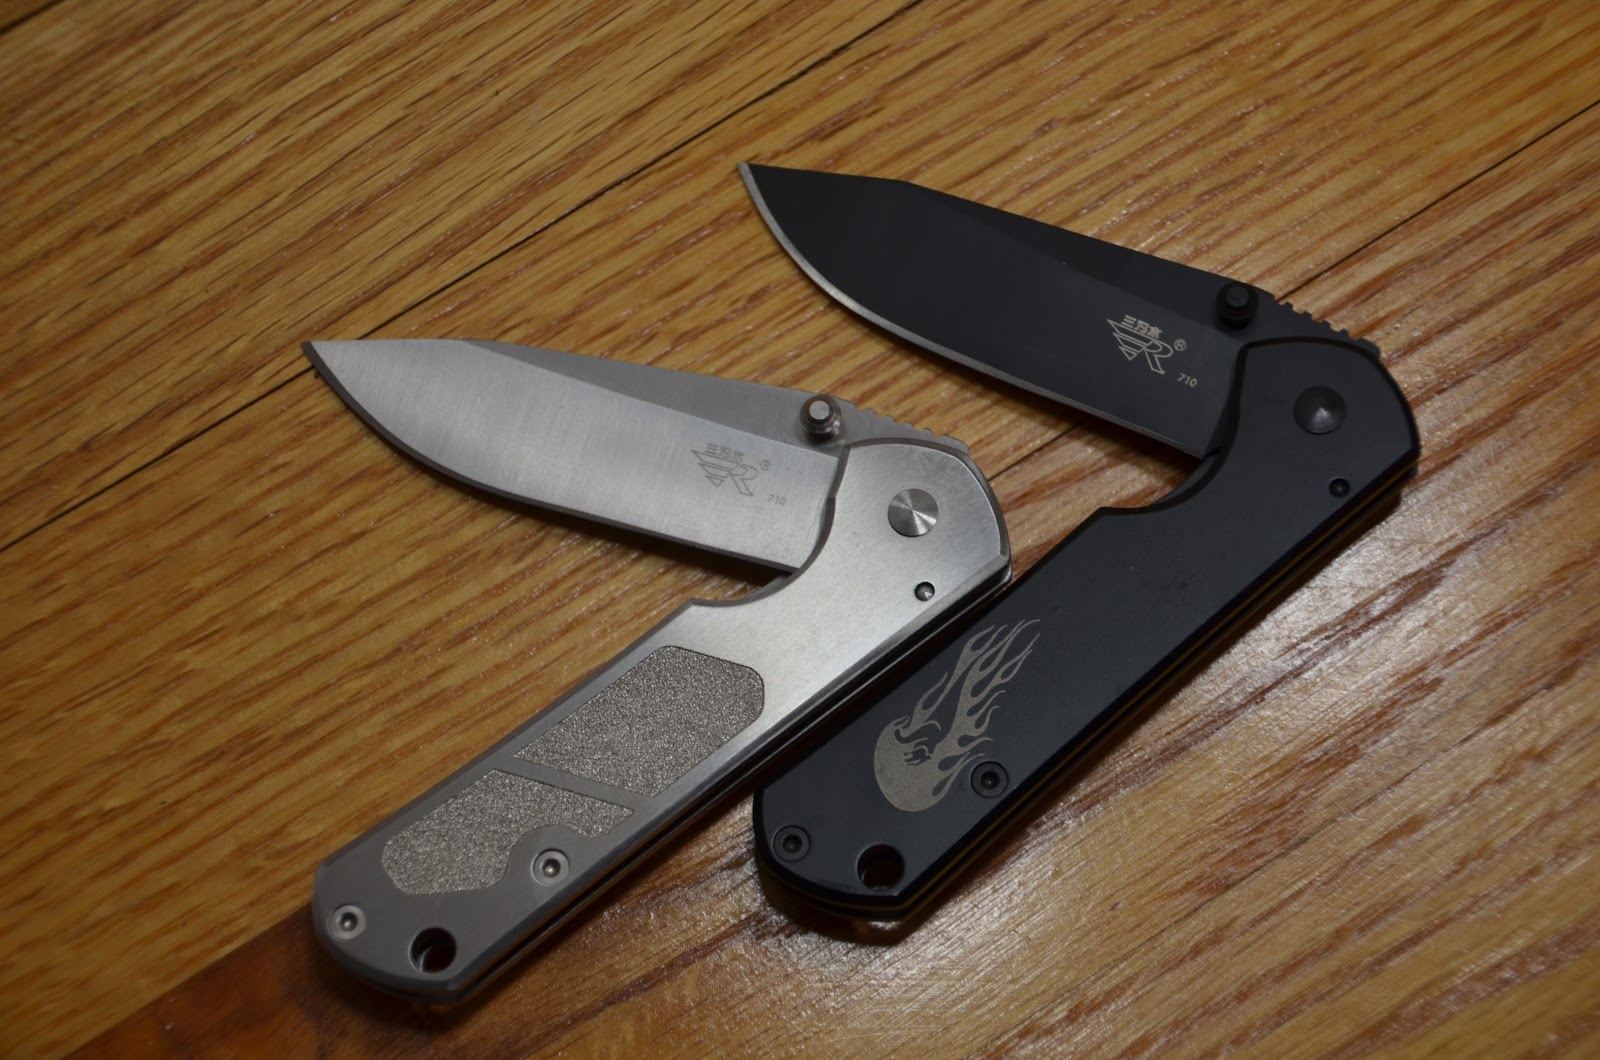
Sanrenmu 710 in Black and Silver

Back in June of this year I did a review of the Sanrenmu 710 folding knife.  You can read the review here: Sanrenmu 710-The Perfect Pocket EDC.  I continue to carry this knife on a regular basis because it is such an excellent knife; I'm confident that you too will find that it is the Perfect Pocket EDC.  I have been so pleased by this knife that I recently acquired 22 brand new Sanrenmu 710 knives; 11 each in Black and Silver.  I know that you can very easily find a cheaper price from other sources, however, you will most likely have to wait several weeks for your shipment to arrive.  But...  If you want one now, I have these knives available for $14.99 including immediate free shipping (USA Domestic only).  So why wait?  The price isn't unreasonable, the gift giving season is pressing upon us and if you order now you'll have the knife in just a few days.  These would make a great gift, stocking stuffer or personal purchase. Supplies are very limited, so don't miss out on this opportunity! I expect that these will go fast so send me a comment with your email address, full mailing address, and which color you want and the quantity so that I can verify the inventory.  I'll then send you a PayPal Invoice for payment.  After all of the knives have sold, I'll post an update.  ~Keep it Sharp.

Sunday, November 25, 2012

Straight Razor Shaving with a 3-Blade Disposable?

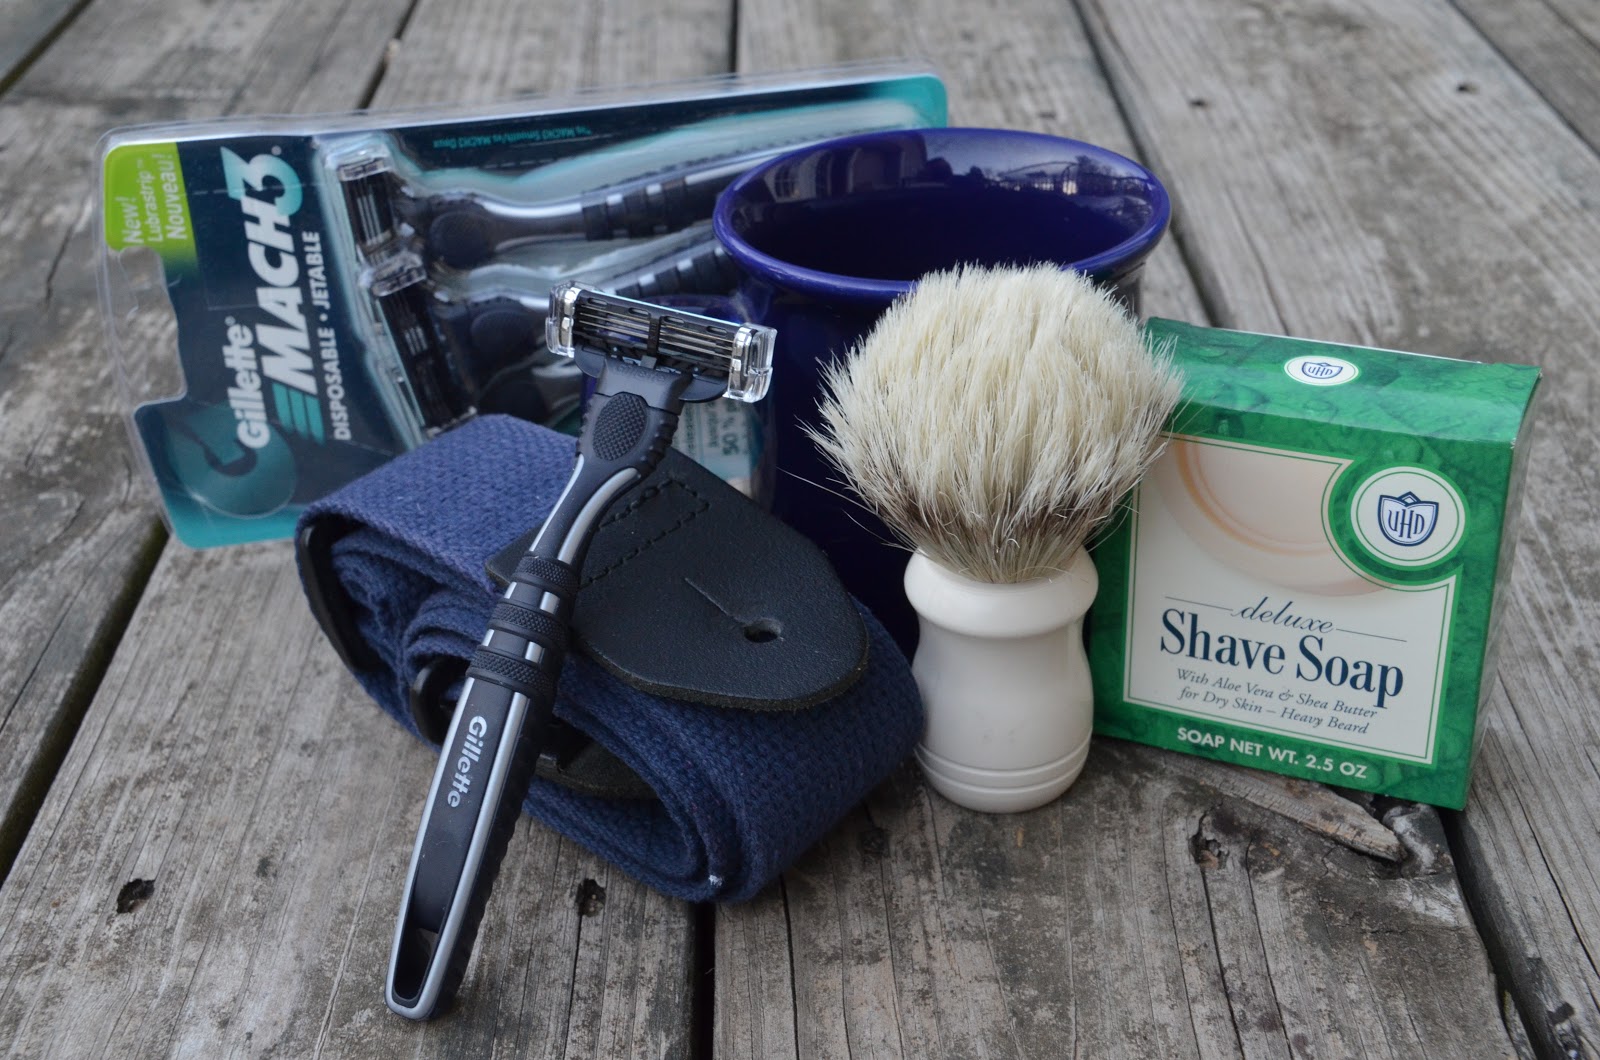
Is it possible to get a straight razor shave from a disposable triple-blade razor?  While the experience is definitely not the same; for, after all, there is a sense of manliness, nobleness and nostalgia associated with shaving with a straight razor; however, it is possible to replicate a pseudo-experience.  Now, I personally own several vintage straight razors which have been honed with a precision edge and each of these razors give the classic baby face closeness; so, don't misunderstand me...  I'm not saying that shaving with a disposable provides the same pleasure and experience.  Even so, I believe I have found a way to provide the same, consistent "close as a straight razor-like" shave with a disposable razor.  Especially when time and convenience is necessary, this technique is a winner.  And, there is a bonus from this setup, but first...

Here's the recipe for success:

Gillette Mach 3 (Sensitive) Disposable Razor
Shaving Brush
Shaving Soap
Soap Mug
Cotton Webbed Guitar Strap

The real secret and success to this setup is simply stropping the disposable razor with the cotton webbed guitar strap.  By stropping the razor 20-25 times before shaving, I have been assured a very close comfortable shave and dare I say, "as close as a straight razor-like shave".  So, here's the bonus...  I've been stropping and shaving with the same disposable razor since January 1, 2012.  With more than 10 months of using this technique, I am very comfortable and confident in recommending this method of shaving.  I purchased a 3 pack of the the Gillette Mach 3s for under $7 and having only used one razor, so far, I would consider this a real bargain.  Plus, there's no indication at this point that this same razor is anywhere near the end of its useful life.  By the way, this technique even works great for reviving razors previously used on your wife's legs.  So give it a try and let me know what you think.  ~Keep it Sharp.

Saturday, September 15, 2012

McAfee's Knob and DIY Tarp Project

I had been planning an overnight camp trip for a couple of weeks and was finally able to make it happen this weekend.  My goal was to try out a new homemade plastic tarp, sharpen up some bushcrafting skills and techniques; and most importantly, spend some time with one of my boys. The outing took place near McAfee's Knob which is located near Roanoke, Virginia.  The hike is about 8 miles round-trip but worth the effort once you get to the Knob; revealing one of the finest views in Virginia.

Having seen this DIY tarp on a YouTube video a few months ago, I was convinced that this was a project that had the potential of being very cost effective and easy to pack.  Completing the project was really quite simple and can be completed in less than two hours.  The material list in putting this project together is inexpensive and includes the following items:
  1. Husky 9 X 12 Plastic Drop Cloth (2mil) from Home Depot ($2.98)
  2. Duct Tape-40yards from Home Depot ($4.89)
So, there you have it...  for under $8, I was able to make  a reasonably lightweight and reliable homemade tarp that provides for more than adequate shelter.  The whole project took about 1.5 hours to complete. The most time consuming
portion was in reinforcing the plactic with the duct tape; this included both sides of the edge, the center line and the diagonals.  By adding the diagonal reinforcement, it seemed logical that this would reduce the stress of the plastic when putting on a load when staking and tying down.  In addition I decided to use duct-tape straps instead of grommets on the tie ends.   The hexagonal shape provides excellent coverage and the whole tarp weighs about 22 ounces.  The entire tarp rolls up to approximately 5.25" X 7". With the cost of sil-nylon tarps and the like, this really is a remarkable and cost effective alternative that won't let you down.  While the durability is yet to be determined, I can't think of a reason why this tarp wouldn't find a place in my pack on every overnight outing going forward. By the way, this was the first overnight with a hammock  Besides not having to sleep on the ground, there are definitely some pluses in selecting this type of sleep system.  I need to spend additional nights trying to optimize this method, so it may be awhile before I post my thoughts.  On the other hand, the DIY tarp and hammock combo complimented each other very well.  ~Keep it Sharp.


Saturday, September 1, 2012

Enzo Trapper Knife Review


Back in March of this year I purchased an Enzo Trapper Knife kit from Curtis at Omaha Knife.  This was a straight forward knife kit that turned out exceptionally well.  The knife purchased was in O1 steel with Curly Birch handles.  While I never got around to posting pictures of the completed project, the Blue Ridge Survival Blog header has had a picture of this very knife.   I’ve been so impressed by this knife, I ordered and received my second Enzo Trapper earlier this week. 

Specifications:

Blade:  Full tang O1 tool steel with Scandinavian Grind– The Trapper is also available at Omaha Knife in D2 (both Scandi and Flat Grind), and 12c27 Stainless.  I have no doubt that D2 and 12c27 are excellent steels, especially since the Enzo brand represents high quality.  I purchased the O1 because I find it works well for me; I like the carbon steel and in terms of quality, ease of sharpening and edge retention the O1 steel has performed flawlessly.  From the factory this blade arrives hair popping sharp.  This type of grind lends itself especially well to bushcrafting tasks and is one of the simplest edges to sharpen.

The Trapper in Curly Birch was the first
acquisition.
Overall Length:  8 1/4” from tip to heel.  Blade length is 3 3/4".  Blade thickness is 1/8”.

Handle Material/Scales:  Burgundy Linen Micarta

Sheath:  The leather sheath is excellent and of very high quality.  The leather used to form the sheath is thick and comes with a dangler.  
Putting it all together...

As I said, this is a straight forward kit.  The kit was packed very well from Omaha Knife with the contents having the blade, handle material, corby brass bolts and a leather sheath.  The customer service from Omaha Knife is excellent.  I ordered the knife on Sunday and received it Wednesday.  I consider that very fast since the order could not get processed until Monday morning at the earliest. 

The scales that I 
ordered came pre-formed and pre-drilled, so the handle material is simply epoxied to the handle end of the blade, bolted and clamped.  The epoxy that I used is T-88 Structural Epoxy and it has a cure time of about 24 hours.    The next day after the epoxy cured, a Dremel tool was used to remove as much of the excess length from the brass bolts as possible.  I then used a small file to finish the brass pins flush with the handle.  The Dremel was also used to remove the excess handle material so that it's flush with the tang; I then followed up with 400 grit sandpaper on the handle material to smooth everything and round sharp corners.  Boiled Linseed Oil was then put on the handle and allowed to dry overnight.  Even with the Micarta handles, the Boiled Linseed Oil worked well.  Since this knife has the Micarta handle, I intend for this to be my primary workhorse.  I know all of this seems over simplified, but it really is a very straight forward knife kit.  I’ve been very pleased by the overall results and it’s satisfying to have built such a high quality knife.  This is a great weekend project that won’t take all weekend, so I highly recommend it.   ~Keep it Sharp.

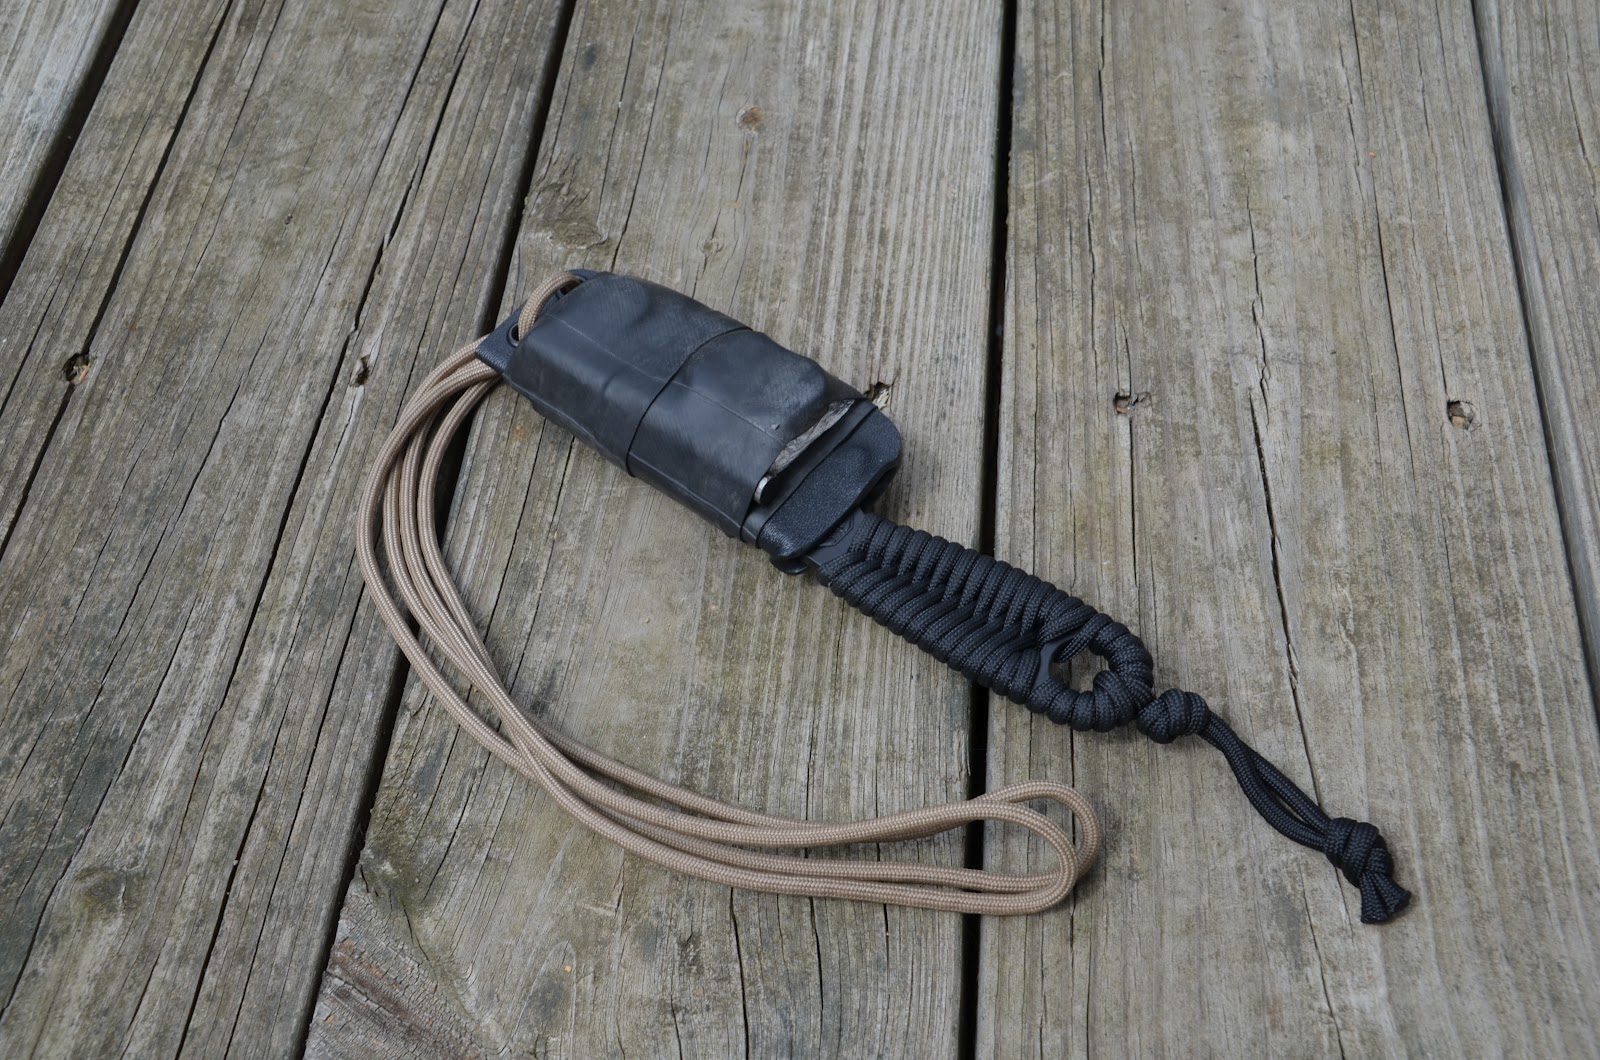
Becker BK14 Neck Knife-Survival Kit


Whether I go out on a back woods camping trip or a simple day hike, I think about being prepared for the possibility that I might be out longer than intended.  So anticipating the challenges associated with spending a few more hours, an additional overnight or even a few more days, should be part of our physical and mental preparation. 

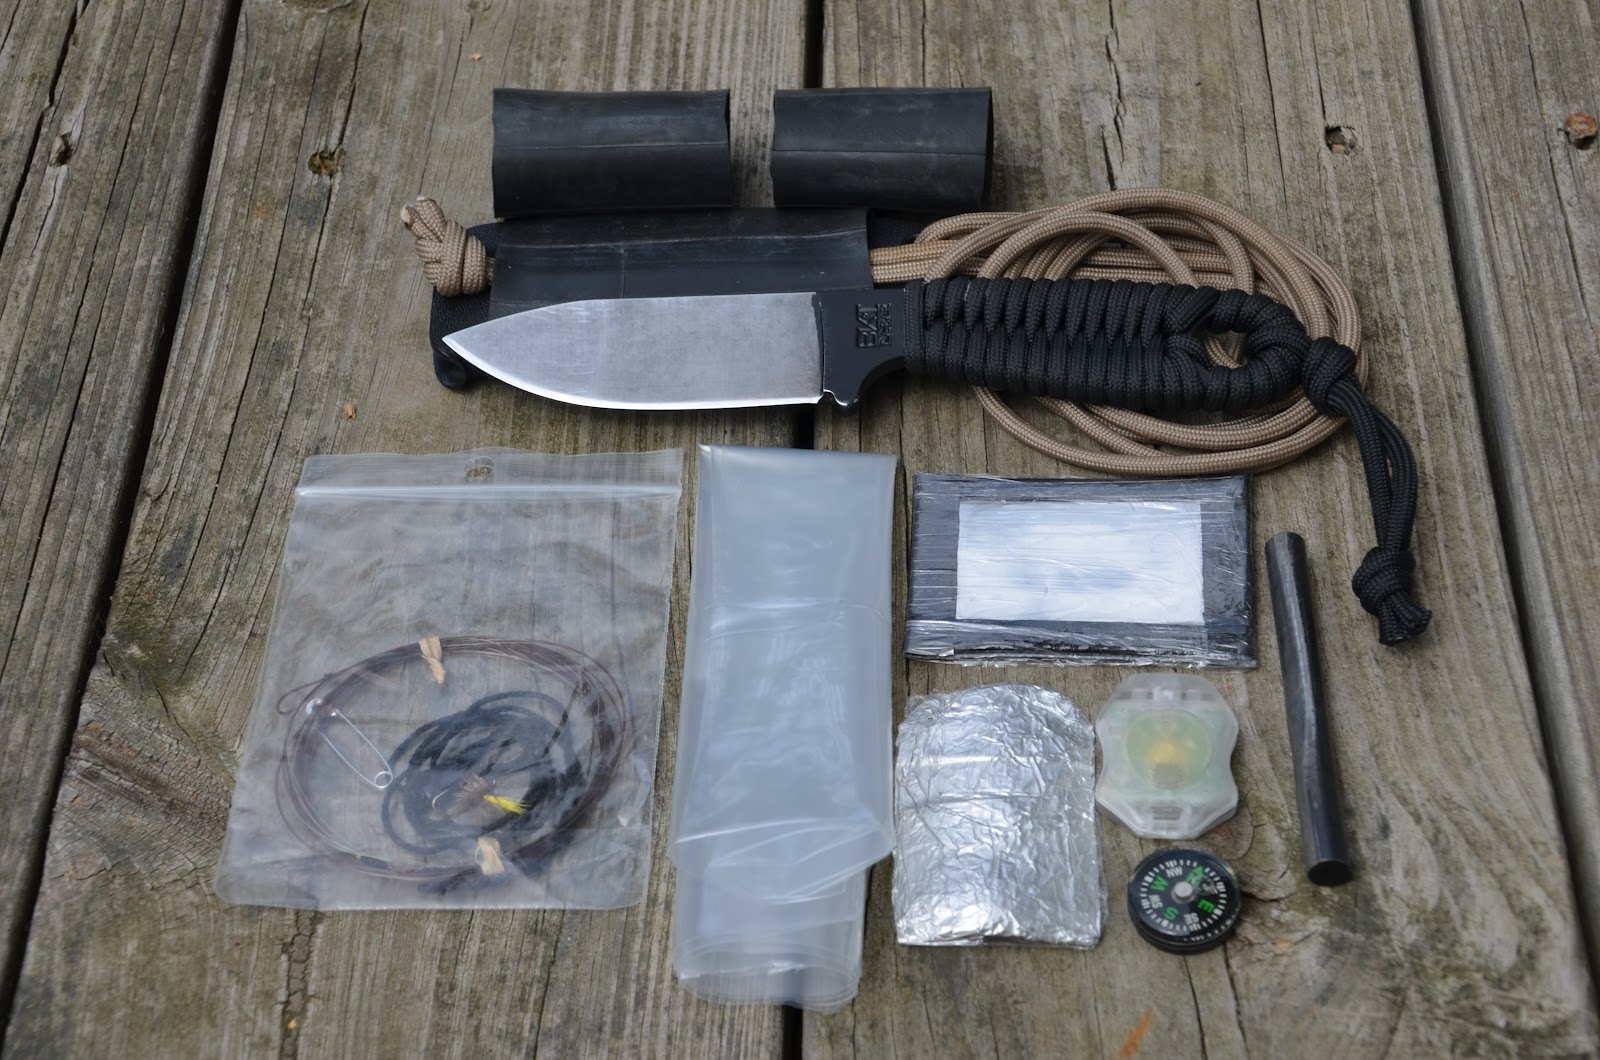
With that in mind I think along the lines of Shelter, Water, Fire, Signaling, Navigation and Food.  One of the basic kits that I carry is a Becker Bk-14 Neck Knife to accomplish this philosophy of survival.  By utilizing ranger bands (or bicycle inner tube) it is simple to create a personal survival kit.  Here is what is in my kit:

Shelter:  With a personal survival kit such as this, whatever clothing we have on would be considered our basic shelter.  Hopefully we have dressed appropriately to anticipate the season and any changes in the weather.  

Water:  I’ve included a Plastic 1-gallon storage bag.  This can be used to retrieve or collect water in multiple ways.  I always carry a water bottle so even if it becomes necessary to treat the water by boiling; a plastic bottle will do.  


Fire: The fire steel and Vaseline charged cotton ball (in tin foil) will easily initiate a fire.   Of course the Becker knife is excellent for making feather sticks and processing wood to build the fire.  

Signaling:  A small proton light and signaling mirror meets this requirement.  The signaling mirror is made from an aluminum can and has been highly polished. 

Navigation:  A simple button compass will provide the means for navigation in the general direction to safety.  


Food:  Fishing line and a fly from my fly-fishing gear will provide the means for food if I’m near a stream.  Included is a safety pin, just in cases I need to use live bait. 

The para-cord used around the neck and the knife handle provides for about 10 feet of cordage which can be used for a number of items including fishing and trapping.  All in all a very basic, concise and lightweight kit that has a survival form factor that will facilitate success when necessary.  ~Keep it Sharp.


Friday, June 8, 2012

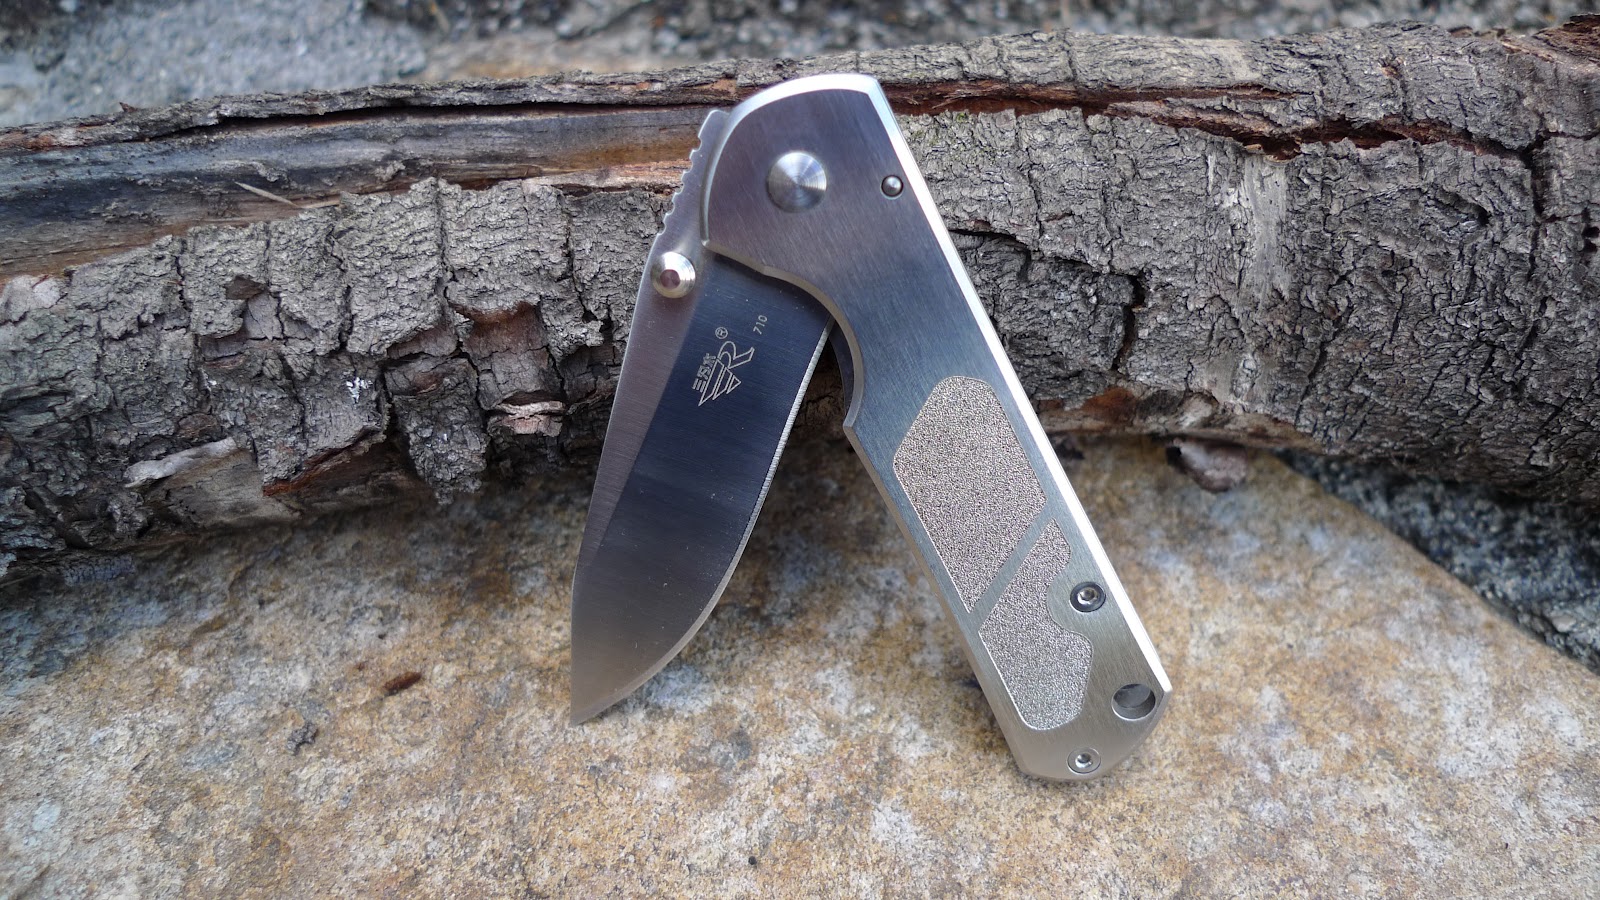
Knife Review of Sanrenmu 710 - The Perfect Pocket EDC


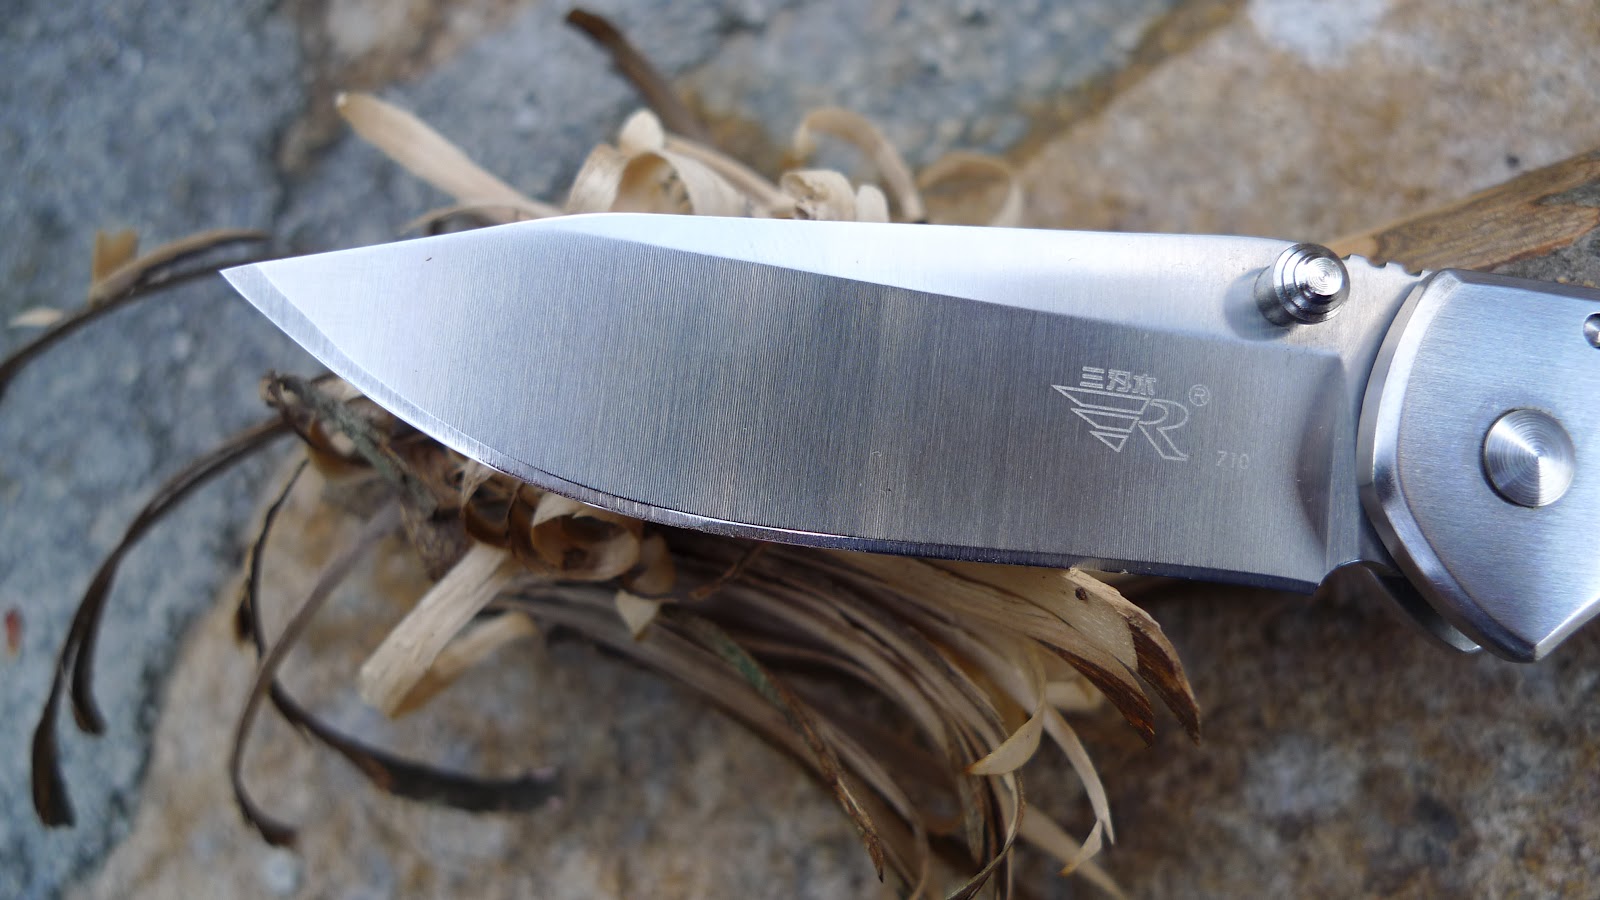
For the past few weeks, I have been trying to find the perfect folding knife that conveys function and style; and one that is easy to pocket for everyday carry (EDC) whether in my suit or on the trail.  While I know that no folding knife is perfect; at least for me, I believe I have found one that most certainly meets the requirements.  So, let me introduce to you the Sanrenmu -SRM 710 Pocket Folder.

Specifications:

Blade-8cr13MOV 57 HRC
Satin Polished Stainless Steel
Lanyard Hole
Razor Sharp
Thumb Studs Opening
Stainless Steel Pocket Clip 
Open- 6 1/2"
Weight- 3.25 oz.

Ease of Deployment – Deploying the blade is accomplished with one hand.  Out of the box, deploying the blade was stiff and slow.  However, after adding a touch of silicone lubricant to the pivot point and flipping the blade about 50 times, the deployment is now lightning fast and very smooth.   The stainless clip is particularly functional and easy to slip onto the front pocket of a pair of dress pants or jeans.  I’ve read that some have used the pocket clip as a money clip.  The blade is secured by a frame lock while in the deployed position with no blade play whatsoever.

Ease of Getting a Sharp Edge – I found the blade edge to be sharp out of the box; however, with the use of a Japanese waterstone and Leather strop, I was able to get a super sharp edge.  I prefer a convex edge on my knives; and this was easily accomplished with my sharpening setup.  The steel on this blade is quite incredible; in fact, I was able to get the edge to straight razor sharpness; where I was able to perform the hanging hair test successfully.  (See Video Below).  The  8Cr13MoV stainless steel blade is an excellent steel and it is amazingly reliable.  The edge retention is simply superb.

Edge Retention – Edge retention is always a concern for me because I want a blade that will be able to hold the edge throughout the day while being used in a variety of tasks.  With this particular blade I was able to create several feather sticks with little to no effect on the blade.  The edge developed no nicks or chips; nor was there any edge roll.  Even after cutting the feather sticks, the edge was able to slice through a piece of paper without getting hung up.

Style/Comfort – I know that beauty is in the eye of the beholder; however, I really appreciate the aesthetics of this knife.  The combination of weight and size makes this knife especially comfortable to hold while doing routine tasks.  The overall look and satin finish of the frame presents a classic style whether in a suit or out in the woods.   The overall design, coupled with the sharp blade provided comfort as I worked on the feather sticks.  The rounded edges of the frame made it so that hotspots were virtually unnoticeable.

The Sanrenmu 710 is available in a Satin Polished Stainless steel, Black TiNi Finish with Laser Etching. and a Camouflage pattern. Having reviewed the Sanrenmu 707 folding knife previously, I must say that I am impressed with the quality of both of these knives. Quality and economy go a long way, especially these days; and with these knives, there is no lacking in both function and style.  I'm pleased to say that the SRM-710 is now my everyday carry..  ~ Keep it Sharp.


Thursday, May 10, 2012

My Everyday Carry Load


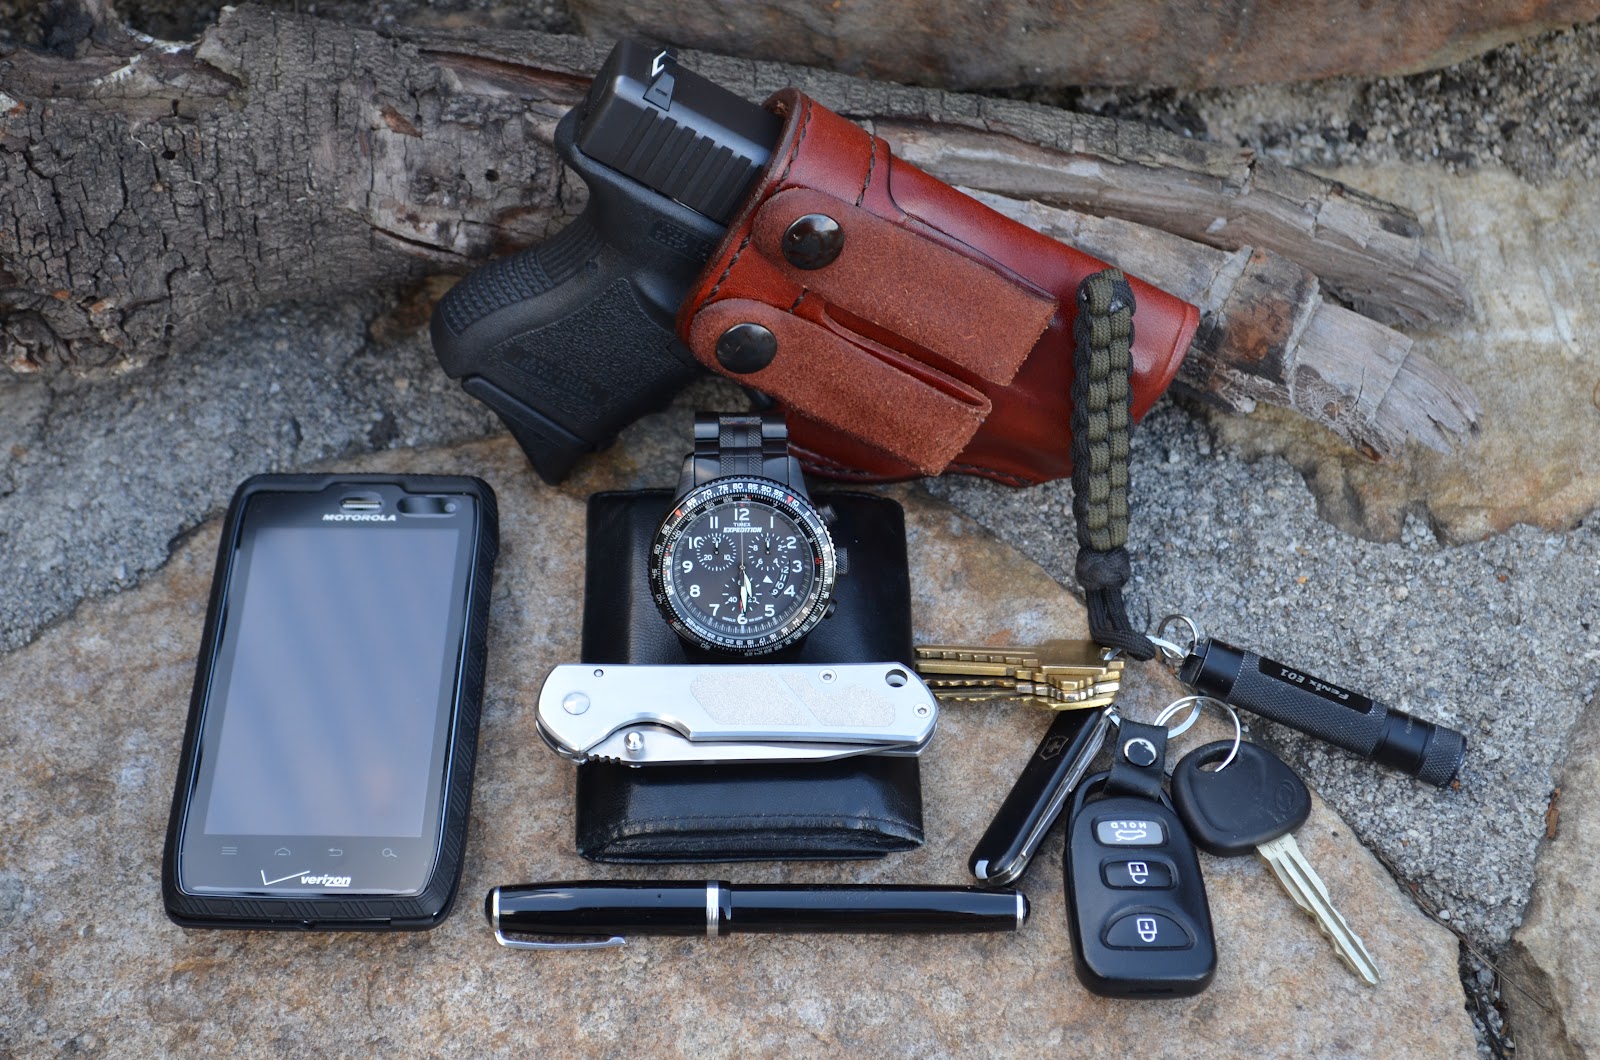
Keeping things light and simple has been the driving principle in my philosophy of everyday carry.  As you can see, I attempt to carry only the essentials.  Whether in a suit at work, or in jeans/shorts when not at work, this has been my typical load for several years.  Of course, individual items will be switched out from time to time.  So here's what I'm carrying today:
  • Glock 26 - Extremely comfortable to carry IWB and most important; a very concealable, reliable and accurate companion.
  • Timex Expedition Chronograph - Stylish and Bold.  I love this watch, especially since it was a gift from my kids.
  • Esterbrook J Fountain Pen - A vintage pen that is more than 60 years old.  I have several vintage fountain pens that I rotate routinely, but this is definitely a favorite.
  • Moleskine Softcover Notebook (not pictured) - This has been, by far one of the best notebooks I have ever used.  The Private Reserve ink I use with my fountain pens works exceptionally well with the paper. 
  • Black Leather Wallet by Stafford - Nothing fancy here, except to say that this particular wallet  wears well and has improved with age.
  • SRM (Sanrenmu) 710 Knife - I just started carrying this knife and have found it to be perfect whether wearing a suit or in other attire.  I've been able to get the edge on this super crazy sharp.  I will most likely post a review on this knife in the next couple of weeks.
  • Motorolo Droid 4 - I very much like the Android platform.  This is a recent acquisition; switching from the HTC Incredible.  So far I've been satisfied with the change. 
  • Braided Lanyard with Keys - On the ring is a Victorinox Classic and Fenix E01Light.
Perhaps in another post I will comment on the content of my two ready bags that I keep in the car at all times.  In the meantime ~Keep it Sharp.


Saturday, May 5, 2012

EDC Carry - Vintage Fountain Pen


There are some things from the past that I really appreciate; and, at least from my perspective, helps me to slow  the pace of life down.  One of those things that have helped me to keep this perspective is a fountain pen.  Now I know that for most of us, thinking about such an utilitarian item seems inconsequential, particularly with the advent of netbooks, laptops, tablets and smartphones; however, part of my EDC includes a vintage fountain pen. So, let me try to convince  you (or at least peak your interest) that there is a nostalgia and nobleness related to carrying and using a fountain pen. While there may be a stark contrast in carrying say an Esterbrook J vintage fountain pen with a Glock 26, there is also a synergism that exists which complement one another.  There is a feeling that is difficult to describe when using a fountain pen, and can be understood only after writing with one.  In fact, most who use a fountain pen on a daily basis regard all other writing instruments as ink sticks.  While my preferred personal notebook is a black softcover Moleskine, my black Esterbrook J (which boasts a 9048 writing nib) writes exceptionally smooth on most papers with nary any bleed through.  The ease in keeping the pen filled with ink is accomplished through a lever filler and bottled ink; so; since I keep bottles of ink in a variety of colors at home and work, I never have to be concerned about running dry.  There is a style and elegance in writing with such a vintage instrument with some who will claim that their penmanship has vastly improved and is attributable specifically to using a fountain pen.  I have received many astonished looks when I pull out the Esterbrook to sign papers or while I take notes.  A conversation starter for sure, my vintage Esterbrook J fountain pen is a classic EDC that will never go out of style and does not disappoint.  Incidently, the Esterbrook J is more than 60 years old. ~Keep it Sharp.